Baking for the Pasadena Civic Ballet

26 Feb

As many of you know, I have started my own pop-up bakery business for my high school Senior Project. I recently “popped up” at The San Gabriel Mission Playhouse for the opening weekend of Peter Pan presented by the Pasadena Civic Ballet. It was a beautiful show, and the environment around the auditorium was joyful and bustling.


I decided to use a green and purple theme to match the colors of the performance. I loved the way the plush green tablecloth made everything pop. Various shades of green and purple ribbon dressed up basic cellophane bags and differentiated products from one another. My mom’s flower arrangements really completed the look of my table; I love the freshness and ease that they add to the spread.

These chocolate friands with mirrored chocolate glaze are a French take on a traditional American cupcake. Rich and decadent, they resemble flourless chocolate cake in flavor and texture. They looked absolutely adorable in mini liners, perfect for popping into your mouth during a few minutes of intermission. 


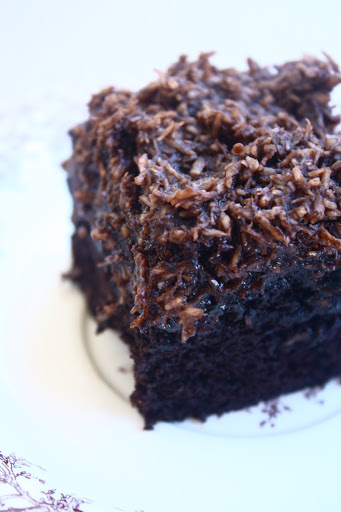
My chocolate soufflé cakes have become something of a signature item. How could you resist a cloud-like chocolate dessert served in one of these mini baking molds? I loved watching little kids jump up and down at the sight of them, pointing excitedly and tugging on their parents’ arms to ask for money. So cute! 


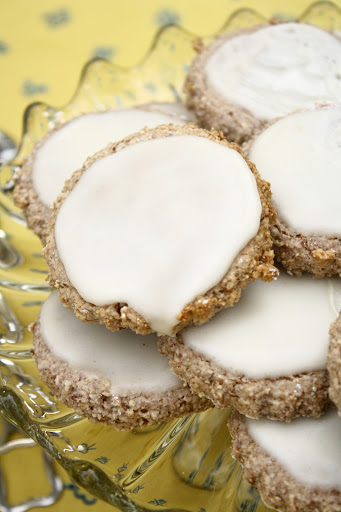
I made zimtsternes for my first event at the Summer Opportunities Fair. After receiving such a positive response from customers, I had to bring them back. A traditional Swiss cookie made with ground almonds, honey, powdered sugar, and cinnamon, they are barely crunchy on the outside and soft in the center. Other items included grapfruit-olive oil loaf cake, and oatmeal raisin, lemon shortbread, and chocolate chunk cookies. 

The event was a great learning experience for me, because I branched out to an unfamiliar venue and catered to a unique crowd of people. It is important for me to adapt my presentation and tweak menu offerings based on where I am and who I am serving. After this event, I appreciate the expression, “It’s all about the customer.” While I have to stay true to my aesthetic, I must also be aware of my audience’s desires. 

It is exciting for me to learn new lessons with every project I take on. Follow Let’s Live La Vida on Facebook to see where I’ll be popping up next. If you have any inquiries or would like me to cater a private function, please email me at maral.lavida@gmail.com. 

Senior Project: My Own Pop-Up Bakery

3 Feb

At my school, every senior pursues a project about a topic she is passionate about and wishes to explore further. For my Senior Project, I have started my own pop-up bakery, and will chronicle all my experiences on this blog. My first event was the Summer Opportunities Fair at my school, where I set up my own table filled with homemade, “rustic French desserts.” 

Chocolate soufflé cakes and brownie drop cookies with walnuts, by far the two most popular items of the day. 

I came up with the idea for my project during the middle of my junior year, but have fantasized about opening my own bakery for a while now. I daydreamed about designing a space and baking dozens of beautiful goodies, but never thought about the hours of meticulous planning and labor required to open up shop for a day. 

After a week of deliberation, I decided to make rustic, French-inspired goodies because they felt the most natural to me. I baked until 2 a.m. the morning of the fair, and woke up at 6:30 to finish up some last-minute items and package everything. The final menu included heart-shaped chocolate soufflé cakes, citrus-glazed poppyseed mini loaf cakes, chocolate pecan torte, brownie drop cookies, zimtsterne cookies, lemon shortbread cookies, and big-cluster maple granola. 


I learned so much from this experience, and everything sold out within a few hours! It was so satisfying to tell people about my project and to see their genuine interest in my baked goods. I felt great when customers returned to my stand two or three times to buy additional items or to tell me how much they enjoyed something. I love to bake for family and friends, but receiving genuine compliments from complete strangers elevated my excitement to a new level. 

One major lesson I learned is that presentation is key. Many people stopped at my stand because of how aesthetically pleasing and professional it looked, with a vibrant yellow tablecloth and bouquets of flowers fresh from the farmers’ market. Investing time and care into packaging products and arranging them on beautiful platters really paid off. 

Zimtsternes are traditional Swiss cookies made with ground almonds, powdered sugar, cinnamon, and honey, and topped with a simple glaze.


For my first pop-up bakery, I was thrilled with the outcome of the day and everyone responded so well to my desserts. I also recognized many aspects that I can improve upon, mostly related to the business side of things. I’m still figuring out appropriate pricing, and would like to optimize my time in the kitchen by prepping certain recipes in advance. My sister and my mom helped me with every step of the process, from brainstorming menu items to assisting me with baking, and I could not have succeeded without them. 


Starting in March, I will pop up at various locations in the Los Angeles area. Follow Let’s Live La Vida on Facebook for specific details about location and time. If you would like more information about my project, or would like me to appear at a private event, please email me at maral.lavida@gmail.com. I cannot wait to see how my business grows in the coming months! 

Chocolate-Coconut Sheet Cake

21 Jan

When I walked into the library on Friday, I spotted the February issue of Martha Stewart Living on the magazine shelf, and decided to actively procrastinate for a few minutes. My eyes nearly popped out of my head when I stumbled upon the Valentine’s Day, all-chocolate dessert spread. Imagine a page covered in silky chocolate, entitled “Truly Madly Deeply,” staring at you as you prepare to buckle down and write an English self-assessment- now that’s a real distraction. But I couldn’t resist the temptation to peruse the recipes, and this chocolate-coconut sheet cake immediately caught my attention. I’m sure you can guess how I ended up spending my Friday night. 😉

Chocolate and coconut are two of my favorite ingredients, and together, well the photo speaks for itself. This is the moistest, most deeply chocolatey cake I have ever made. Buttermilk and brewed coffee are key, and premium Dutch-process cocoa powder accounts for the cake’s rich, almost midnight black color. Taste-wise, every bite is straight out of dessert heaven. Each forkful contains three layers: wisps of tender coconut shavings on top, the fudgey, almost gooey center, and the phenomenal, aromatic cake. I probably sound a bit strange as I passionately describe this baked good as though it has a life of its own, but it’s the weekend before mid-terms, and what’s a girl with a sweet tooth to do? 

Recipe courtesy of Martha Stewart Living

Ingredients 
For the cake:
3/4 cup unsweetened cocoa powder*, plus more for dish 
1 1/2 cups all-purpose flour 
1 1/2 cups granulated sugar 
1 1/2 tsp baking soda 
3/4 tsp baking powder
3/4 tsp salt 
2 large eggs, lightly beaten
3/4 cup low-fat buttermilk**
3/4 cup warm, strong brewed coffee
3 tblsp safflower oil (I used olive oil)
1 tsp pure vanilla extract 

For the topping:
1 stick plus 2 tblsp unsalted butter
2 cups confectioners’ sugar 
6 tblsp unsweetened cocoa powder 
3 cups finely shredded, dried, unsweetened coconut
2/3 cup warm, strong brewed coffee 
1 tsp pure vanilla extract 

1. Preheat the oven to 350 degrees F. Butter a 9-by-13-inch baking dish; line the bottom and two long sides with parchment, leaving an overhang. Butter parchment, and dust with cocoa powder. Sift together cocoa powder, flour, granulated sugar, baking soda, baking powder, and salt in a large bowl; whisk to combine. Gather flour mixture into a mound, and create a well in center. Pour eggs, buttermilk, coffee, oil, and vanilla into well, and whisk until thoroughly combined and smooth. Pour batter into dish, and spread evenly with an offset spatula. Bake until set, about 25 minutes. Even if the center looks a bit fudgey, it will continue cooking once you remove it from the oven. It is key not to overcook it. 
2. To make the topping, melt butter over medium heat in a small saucepan. Sift confectioners’ sugar, cocoa powder, and coconut in a large bowl; combine with a spoon. Stir coffee and vanilla into melted butter, and pour over coconut mixture. Stir to combine, and immediately spread evenly over warm cake. Let the cake cool completely on wire rack.

*I recommend using Dutch-process cocoa powder, if you wish to achieve a darker color and richer chocolate flavor. However, natural cocoa works fine as well. Here is a link to a photo that demonstrates the contrast between a cake made with Dutch-process versus natural cocoa. David Lebovitz also has a wonderfully detailed post that explains the differences between the two kinds. 
**If you do not have buttermilk on hand, not to worry! You can make your own simply by measuring out 3/4 cup of milk and adding the juice from half a lemon to it. Let the milk sit for a few minutes until it curdles on the top, and you are ready to go. 

Easy Chocolate Pecan Torte

4 Jan

Recipe courtesy of Sinfully Easy Delicious Desserts 

Ingredients 
1 cup raw pecans 
2 tblsp all-purpose flour 
6 oz bittersweet chocolate (66 to 72% cacao), coarsely chopped 
8 tblsp unsalted butter, softened but still cool, cut into chunks 
3/4 cup granulated sugar 
Generous 1/8 tsp salt 
4 cold large eggs 

Serves 10-12

1. Preheat the oven to 350 degrees F. Generously grease the bottom and sides of an 8-inch springform pan with butter. Spread the pecans on a baking sheet and bake them for 7-10 minutes, stirring them once or twice, until they are toasted and fragrant. Scrape the nuts onto a plate and let them cool completely. Increase the oven temperature to 375. Once the nuts have cooled, pulse the pecans and the flour in the food processor until finely ground. 
2. Place the chocolate in a large heatproof bowl, over a pot of simmering water, and stir occasionally until nearly melted. Remove the bowl from the heat and stir the chocolate until it is completely melted and smooth. 
3. Transfer the chocolate into the bowl of a stand mixer fitted with a paddle attachment, and beat in the butter, granulated sugar, and salt until the butter is completely melted and the mixture thickens and lightens slightly in color. Beat in the eggs one at a time, then beat at medium-high speed for a minute or two, or until the batter is fluffy and lightened in color. Stir in the pecan mixture. 
4. Spread the batter evenly into the prepared pan and bake for 30-35 minutes, until a toothpick inserted about 1.5 inches from the side of the pan comes out clean. The center will still be gooey. 
5. Set the pan on a rack to cool. Slide a thin knife around the inside of the pan to loosen the cake and allow the thin crust on top to sink (slightly) as the cake cools. Let cool completely and remove from the pan. Garnish with powdered sugar or whipped cream, if desired. The torte can be kept covered at room temperature for at least 3 days, or frozen, well-wrapped for 3 months.

I am well aware that this luxurious chocolate-pecan torte recipe comes to you at the beginning of “clean eating” month. In January, many of us embark upon kale juice cleanses and grueling gym workouts in an effort to start the new year on the right foot. But this is a baking blog after all, and I could not wait to share this decadent, sinfully easy dessert. 

You only need seven ingredients to throw this torte together. You could substitute hazelnuts or walnuts for pecans and omit the flour for a gluten-free version. The exterior surface crackles just barely after baking, contrasting well with the moist, but not sticky interior. My problem with so many chocolate tortes is their uniformity of flavor and denseness. This cake hit all the right notes: chocolatey but with depth of flavor from the pecans, and sturdy but not dry. It is definitely a crowd pleaser; my family members enthusiastically declared it one of the best baked goods I have ever made. Major score! 

I recommend preparing the cake a day prior to serving it as the extra time enhances its richness. I enjoyed my piece plain, a chocolate purist, but vanilla bean ice cream or freshly whipped cream would complement it beautifully.

The Sycamore Kitchen

16 Dec
The Sycamore Kitchen’s seasonal offerings include this pumpkin pie with crumble topping and a dollop of freshly whipped cream.
As a food blogger, people often ask me about my favorite bakeries in Los Angeles. With so many wonderful bakeries each with its distinct style, it can be difficult to select a single one. The Sycamore Kitchen strikes the ideal balance between European-style patisserie and cozy American bakeshop.

Husband and wife team Quinn and Karen Hatfield, chef-owners of Hatfield’s restaurant, founded Sycamore in the summer of 2012 with the goal of “redefining the urban bakery.” The building’s rustic design of red brick walls, industrial windows, and glossy wood tables contributes to its unique aesthetic. The menu includes American treats we know and love, such as chocolate chip cookies, buttermilk scones, and coffee cake, but with a refined finish. The chocolate chip cookies use rye flour instead of traditional all-purpose for an earthy flavor, sour cherries add vibrance to the buttermilk scones, and crème fraiche moistens the coffee cake. 

The Hatfields use only the highest quality, seasonal ingredients, and offer breakfast and lunch items in addition to sweets. I recommend the Cinnamon Brioche French Toast, the Mediterranean Chicken Salad, and the Farmhouse Chop Salad. For dessert, you must try the Salted Caramel Pecan Babka, a light, buttery pastry wound together by layers of sinful salted caramel. The Sycamore Kitchen also serves excellent coffee, courtesy of Stumptown Coffee Roasters. 

The Sycamore Kitchen 
143 S. La Brea Ave.
Los Angeles, CA 90036
(323) 939 0151
– – – – – – – – – – – – –
Monday-Sunday, 8 a.m. – 5 p.m.

Design a site like this with WordPress.com
Get started