Archive | January, 2014

Oatmeal Sandwich Cookies with Coconut and Dates

24 Jan

If you search “perfect oatmeal cookie” on Google, you will find millions of unique renditions on the classic recipe. Perfect means something different to everyone. Your personality, tastes, and interests influence your idea of a perfect date, concert, or meal, for example.

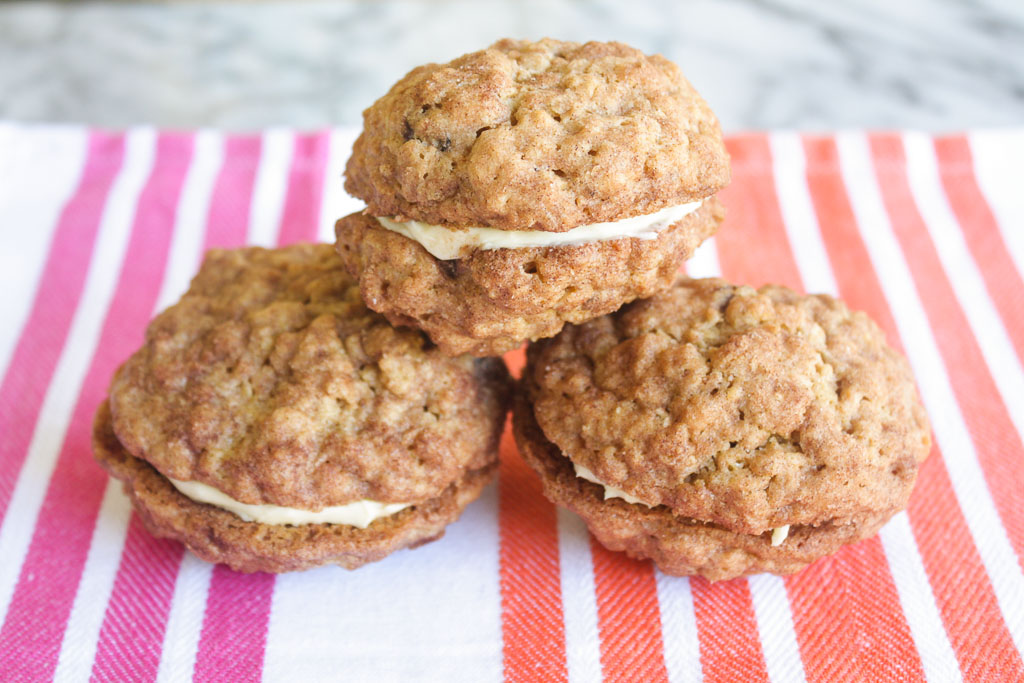
Generally, I find that cookie connoisseurs are divided into two groups: thin and crispy versus soft, thick, and chewy. These oatmeal sandwich cookies fall right in the middle–subtly crunchy and golden on the outside with a soft, almost fluffy center. The brown sugar lends a deep butterscotch flavor, spiced up with the addition of coconut flakes and chopped dates. When sandwiched together with a tangy mascarpone filling, these oatmeal cookies become a grown-up version of a favorite childhood snack.

 Recipe barely adapted from The New York Times

This recipe yields fairly large cookies. If you prefer more manageable, bite-sized sandwiches, I suggest scooping rounded teaspoons of dough.

  • 3/4 cup shredded, unsweetened coconut flakes
  • 1 cup (2 sticks) unsalted butter, softened
  • 1 1/2 cups packed dark brown sugar
  • 2 tblsp honey
  • 2 large eggs, at room temperature
  • 1 tblsp vanilla extract
  • 1 1/2 cups all-purpose flour
  • 1 tsp fine sea salt
  • 1 tsp baking powder
  • 3 tsp ground cinnamon
  • 3 cups rolled oats
  • 1/2 cup dates, pitted and chopped
  • 5 tblsp granulated sugar

For the filling:

  • 6 oz cream cheese, softened
  • 6 tblsp mascarpone cheese
  • 3 tbslp confectioner’s sugar, sifted
  • 1 1/2 tsp vanilla extract

Yields about 36 cookies; 18 sandwiches.

1. Preheat oven to 350 degrees F. Spread coconut flakes on a non-stick skillet. Over medium heat, toast, stirring occasionally, until lightly colored and fragrant, 5 to 7 minutes. Cool. Increase oven temperature to 375 degrees.

2. In the bowl of a stand mixer fitted with the paddle attachment, cream the butter on medium-high speed until light. Gradually add the brown sugar and honey, then beat until very fluffy, about 5 minutes. Beat in eggs, one at a time, scraping down the bowl when necessary. Beat in vanilla.

3. In a large bowl, whisk together flour, salt, baking powder and 1 tsp cinnamon. With the mixer set on low, beat flour mixture into butter mixture until just combined. Beat in oats, dates and toasted coconut.

4. Line three baking sheets with parchment paper. In a small bowl, stir together granulated sugar and remaining 2 tsp cinnamon. Roll heaping tablespoonfuls of dough into balls, then roll balls in cinnamon sugar; transfer to baking sheet, leaving about 1 1/2 inches of space between dough balls. For smaller cookies, reduce the size of the balls.

5. Bake until cookies are golden brown, about 15 minutes. Let cool in the pan for 2 minutes, then transfer to a wire rack to cool completely.

6. Make the filling: Using the electric mixer fitted with a paddle attachment, beat cream cheese until smooth. Beat in mascarpone, confectioner’s sugar and vanilla. Scrape down sides of bowl. Sandwich about 1 tablespoon of filling between two cookies; repeat with the remaining filling and cookies.

Meyer Lemon-Blackberry Loaf Cake

17 Jan

Whenever I bake something new, my mom and I conduct a tasting session around our kitchen table. We assess the texture, complexity of flavor, and uniqueness of an item, savoring each bite in between sips of coffee. While I have undoubtedly inherited her sweet tooth, my mom has also taught me to appreciate quality and attention-to-detail. Unlike a main meal, eating a baked good is a special experience that someone enjoys for a few minutes out of his or her day. Pastries are not meant to be wolfed down for sustenance, but should provide simple pleasure and sweet satisfaction. This philosophy has shaped my baking style and recipe selection.

I chose to make this cake because I thought it would pair well with an afternoon coffee or tea, providing just the right amount of sweetness and tender, moist crumb. Plump, tart blackberries spot the cake’s golden interior, like little jewels that burst inside your mouth. With its beautiful appearance and fresh, unfussy flavors, this loaf epitomizes what a great baked good should be in my book.

Recipe courtesy of Foodess

Because I used fresh, juicy blackberries, I increased the original baking time by 10 minutes. If you opt for a dried fruit or one with less moisture, adjust the baking time accordingly. 

  • 1 1/2 cups all-purpose flour
  • 1 tsp baking powder
  • 1 /4 tsp baking soda
  • 1/2 tsp salt
  • 1/4 cup sour cream or Greek yogurt
  • 2 tbsp finely grated Meyer lemon zest (from two lemons)
  • 1/4 cup fresh Meyer lemon juice
  • 1 tsp vanilla extract
  • 1 cup (2 sticks) butter, softened
  • 1 1/4 cups granulated sugar
  • 4 large eggs, at room temperature
  • 1/2 cup fresh blackberries, broken up into small pieces

For the glaze:

  • 1/4 cup Meyer lemon juice (from 1 lemon)
  • 1/2-3/4 cup powdered sugar, sifted

Yields 12 generous slices.

1. Preheat the oven to 325 degrees F. Grease a 9×5-inch loaf pan, or line with parchment paper. In a medium bowl, whisk together flour, baking powder, baking soda, and salt. Set aside. In a separate bowl, whisk together sour cream, lemon zest, lemon juice, and vanilla. Set aside.

2. In the bowl of a stand mixer equipped with a paddle attachment, beat butter and sugar on medium-high speed until light and fluffy, about 3 minutes. Beat in eggs, one at a time, until fully incorporated. Scrape down the sides of the bowl when necessary.

3. Reduce mixer speed and alternatively beat in ⅓ of flour mixture, followed by ½ of sour cream mixture, and repeat, ending with the last ⅓ of the flour mixture. Be sure to pause the mixer occasionally to scrape down sides of the bowl. Using your hands, gently break up the blackberries into small pieces. Use a spatula to gently fold them into the batter.

4. Pour batter into prepared loaf pan and bake for 60-80 minutes, until the top springs back when lightly pressed or a toothpick inserted in the center comes out clean. Cool 5 minutes in pan, then transfer to a cooling rack. Cool completely before icing.

5. To make the glaze, whisk together lemon juice and powdered sugar until there are no lumps. Adjust the amount of powdered sugar based on desired thickness. Drizzle over cooled cake.

Lemon-Rosemary Scones with Golden Raisins

8 Jan

When I joined my high school student newspaper staff, I learned about the concept of evergreen articles. In journalism, the term “evergreen” describes stories that remain relevant over long periods. I think this same concept can be applied to baking. No matter what ingredients are popular at the moment, people will always be on the lookout for certain basic recipes.

Brownies, chocolate chip cookies, and blueberry muffins are classics that every home baker should have in his or her arsenal. Cream scones also belong in this category of essential baked goods–buttery morsels with slightly crunchy tops and fluffy, tender interiors. Despite this pastry’s seeming simplicity, all the renditions I tried came up short from the light-as-air scone of my dreams. So I turned to Baking Illustrated, a source known for extensive testing and detailed instructions, and finally found what I was searching for.

These cream scones provide an ideal base for all sorts of add-ins. The rosemary’s herbaceous flavor offsets the pastry’s richness and contrasts well with the tangy lemon zest and plump, sweet golden raisins. To achieve flaky, buttery layers, it is key to handle the dough minimally and efficiently. Use a food processor to prevent the dough from overheating, and cut the scones with a sharp knife to ensure maximum lift. And there you have it! An endlessly adaptable cream scone recipe that will never go out of style.

Look at those flaky layers

Basic cream scone recipe courtesy of Baking Illustrated

  • 2 cups all-purpose flour, preferably a low-protein brand such as Gold Medal or Pillsbury
  • 1 tblsp baking powder
  • 2 tblsp sugar
  • 1/2 tsp salt
  • 5 tblsp cold unsalted butter, cut into chunks
  • 1/2 cup golden raisins (or other dried fruit of choice)
  • 1 cup cold heavy cream
  • 1 tblsp freshly grated lemon zest
  • 1 tblsp finely diced fresh rosemary

Yields 8 scones.

1. Adjust the oven rack to the middle position and preheat to 425° F. Mix the lemon zest and rosemary into the cream, and allow it to steep in the refrigerator for 10-15 minutes.

2. Whisk the flour, baking powder, sugar, and salt together in a large bowl. Place this mixture into the workbowl of a food processor equipped with a metal blade. Scatter the chunks of butter evenly over the dry ingredients. Cover and process with 10 one-second pulses, or until the dough resembles coarse pebbles.

3. Remove the blade and transfer the mixture back into the separate bowl. Gently stir in the cream with a fork or rubber spatula until the dough begins to form, about 30 seconds. Transfer the dough and loose flour bits to a clean work surface and knead the dough until it comes together into a rough, slightly sticky ball, 5 to 10 seconds.

4. Gently press the dough into an 8-inch round cake pan, release the round, and cut it into 8 wedges using a very sharp chef’s knife or bench scraper. Place the wedges 1/2 an inch apart on an ungreased baking sheet. Bake until the scone tops are lightly brown, 12-15 minutes. Cool on a wire rack for at least 10 minutes. Serve warm or at room temperature.

Peanut Butter Blondies

3 Jan

At the beginning of January, most food blogs share healthy recipes to help you recover from holiday indulgences and commit to your New Year’s resolutions. Even though I am all about kale salad right now (because it tastes delicious), maintaining a truly healthy diet requires balance. An article I read in the New York Times re-affirmed this belief. I love to bake and consume sweets almost every day, but in moderation, which is key. If my diet centers around fresh produce, whole grains, and lean meats, there is nothing wrong with enjoying quality, homemade baked goods. Which leads me to these peanut butter blondies.

Peanut butter is a quintessential American food. However, despite its ubiquity, most people either love it or they hate it. My dad was of the latter camp, and for years, I tried in vain to convert him. I slathered peanut butter on brioche toast, sandwiched it between shortbread, and even sacrificed some of my beloved Girl Scout cookies to the cause. These magical little bars finally inspired him to see the light.

The blondies have an undeniable peanut flavor without being too rich or overpowering. The saltiness of the roasted peanuts contrasts perfectly with the sweetness of the chocolate chunks, and best of all, the batter takes minutes to mix up in a saucepan. My dad ate two in a matter of minutes, and was disappointed when they were all gone. So, what are you waiting for? It’s 2014. Let’s celebrate with some peanut butter blondies.

Recipe courtesy of Chewy Gooey Crispy Crunchy by Alice Medrich

  • 1 cup all-purpose flour
  • 1/2 tsp baking powder
  • 1/4 tsp salt
  • 8 tblsp (1 stick) unsalted butter
  • 2/3 cup packed light brown sugar
  • 1/3 cup well-stirred natural, salted peanut butter (smooth)
  • 1 large egg
  • 1/2 tsp pure vanilla extract
  • 1/2 cup roasted peanuts
  • 1/2 cup (3 oz) semisweet chocolate chips or chunks

Yields 16 blondies.

1. Line the bottom and all four sides of an 8-inch square pan with foil. Position a rack in the lower third of the oven and preheat to 350° F.

2. Combine the flour, baking powder, and salt in a small bowl and mix together thoroughly with a whisk or fork. Melt the butter in a small saucepan. Remove the pan from the heat and stir in the brown sugar and peanut butter. Use a wooden spoon or rubber spatula to beat in the egg, vanilla, and half of the peanuts. Stir in the flour mixture until just combined. Do not overmix.

3. Spread the batter evenly in the prepared pan. Sprinkle the remaining nuts and chocolate chips evenly over the top. Bake for 20-25 minutes, or until the nuts have toasted, the top is golden brown, and the edges have pulled away from the sides of the pan. Cool the pan on a rack for 5 minutes, then lift the ends of the foil and allow the blondies to cool completely on the rack. Use a long, sharp knife to cut into squares. The blondies may be stored in an airtight container for 3-4 days.