Archive | May, 2014

Everyday Eats: Tomato-Chickpea Salad with Yogurt Dressing

20 May

image-15

My cooking skills developed in the most unlikely of places: my college dorm. While most students associate the college diet with endless amounts of junk food, my eating habits changed for the better. Using limited ingredients, I learned to prepare healthy, satisfying, and delicious meals in under thirty minutes. I never worked with raw meat and fish, but discovered creative alternatives to incorporate protein into my diet.

Now that I am back home after completing my freshman year, I have expanded upon this cooking style that initially emerged out of necessity. Salads packed with legumes and veggies, rice bowls topped with a poached egg, and bean soups are just a few items on my list of “Everyday Eats.”

image-17

Once I mastered a basic formula for these dishes (grains + produce + protein + healthy fats), I realized the endless opportunities for adaptation. I have decided to share my original recipes in this weekly column, with the hope that they inspire you to approach cooking from a different perspective. I offer possible variations for each recipe, showing how you can tweak according to personal tastes. An added bonus, almost all of these dishes are ideal for transporting to work, proving that a desk lunch can be something to look forward to.

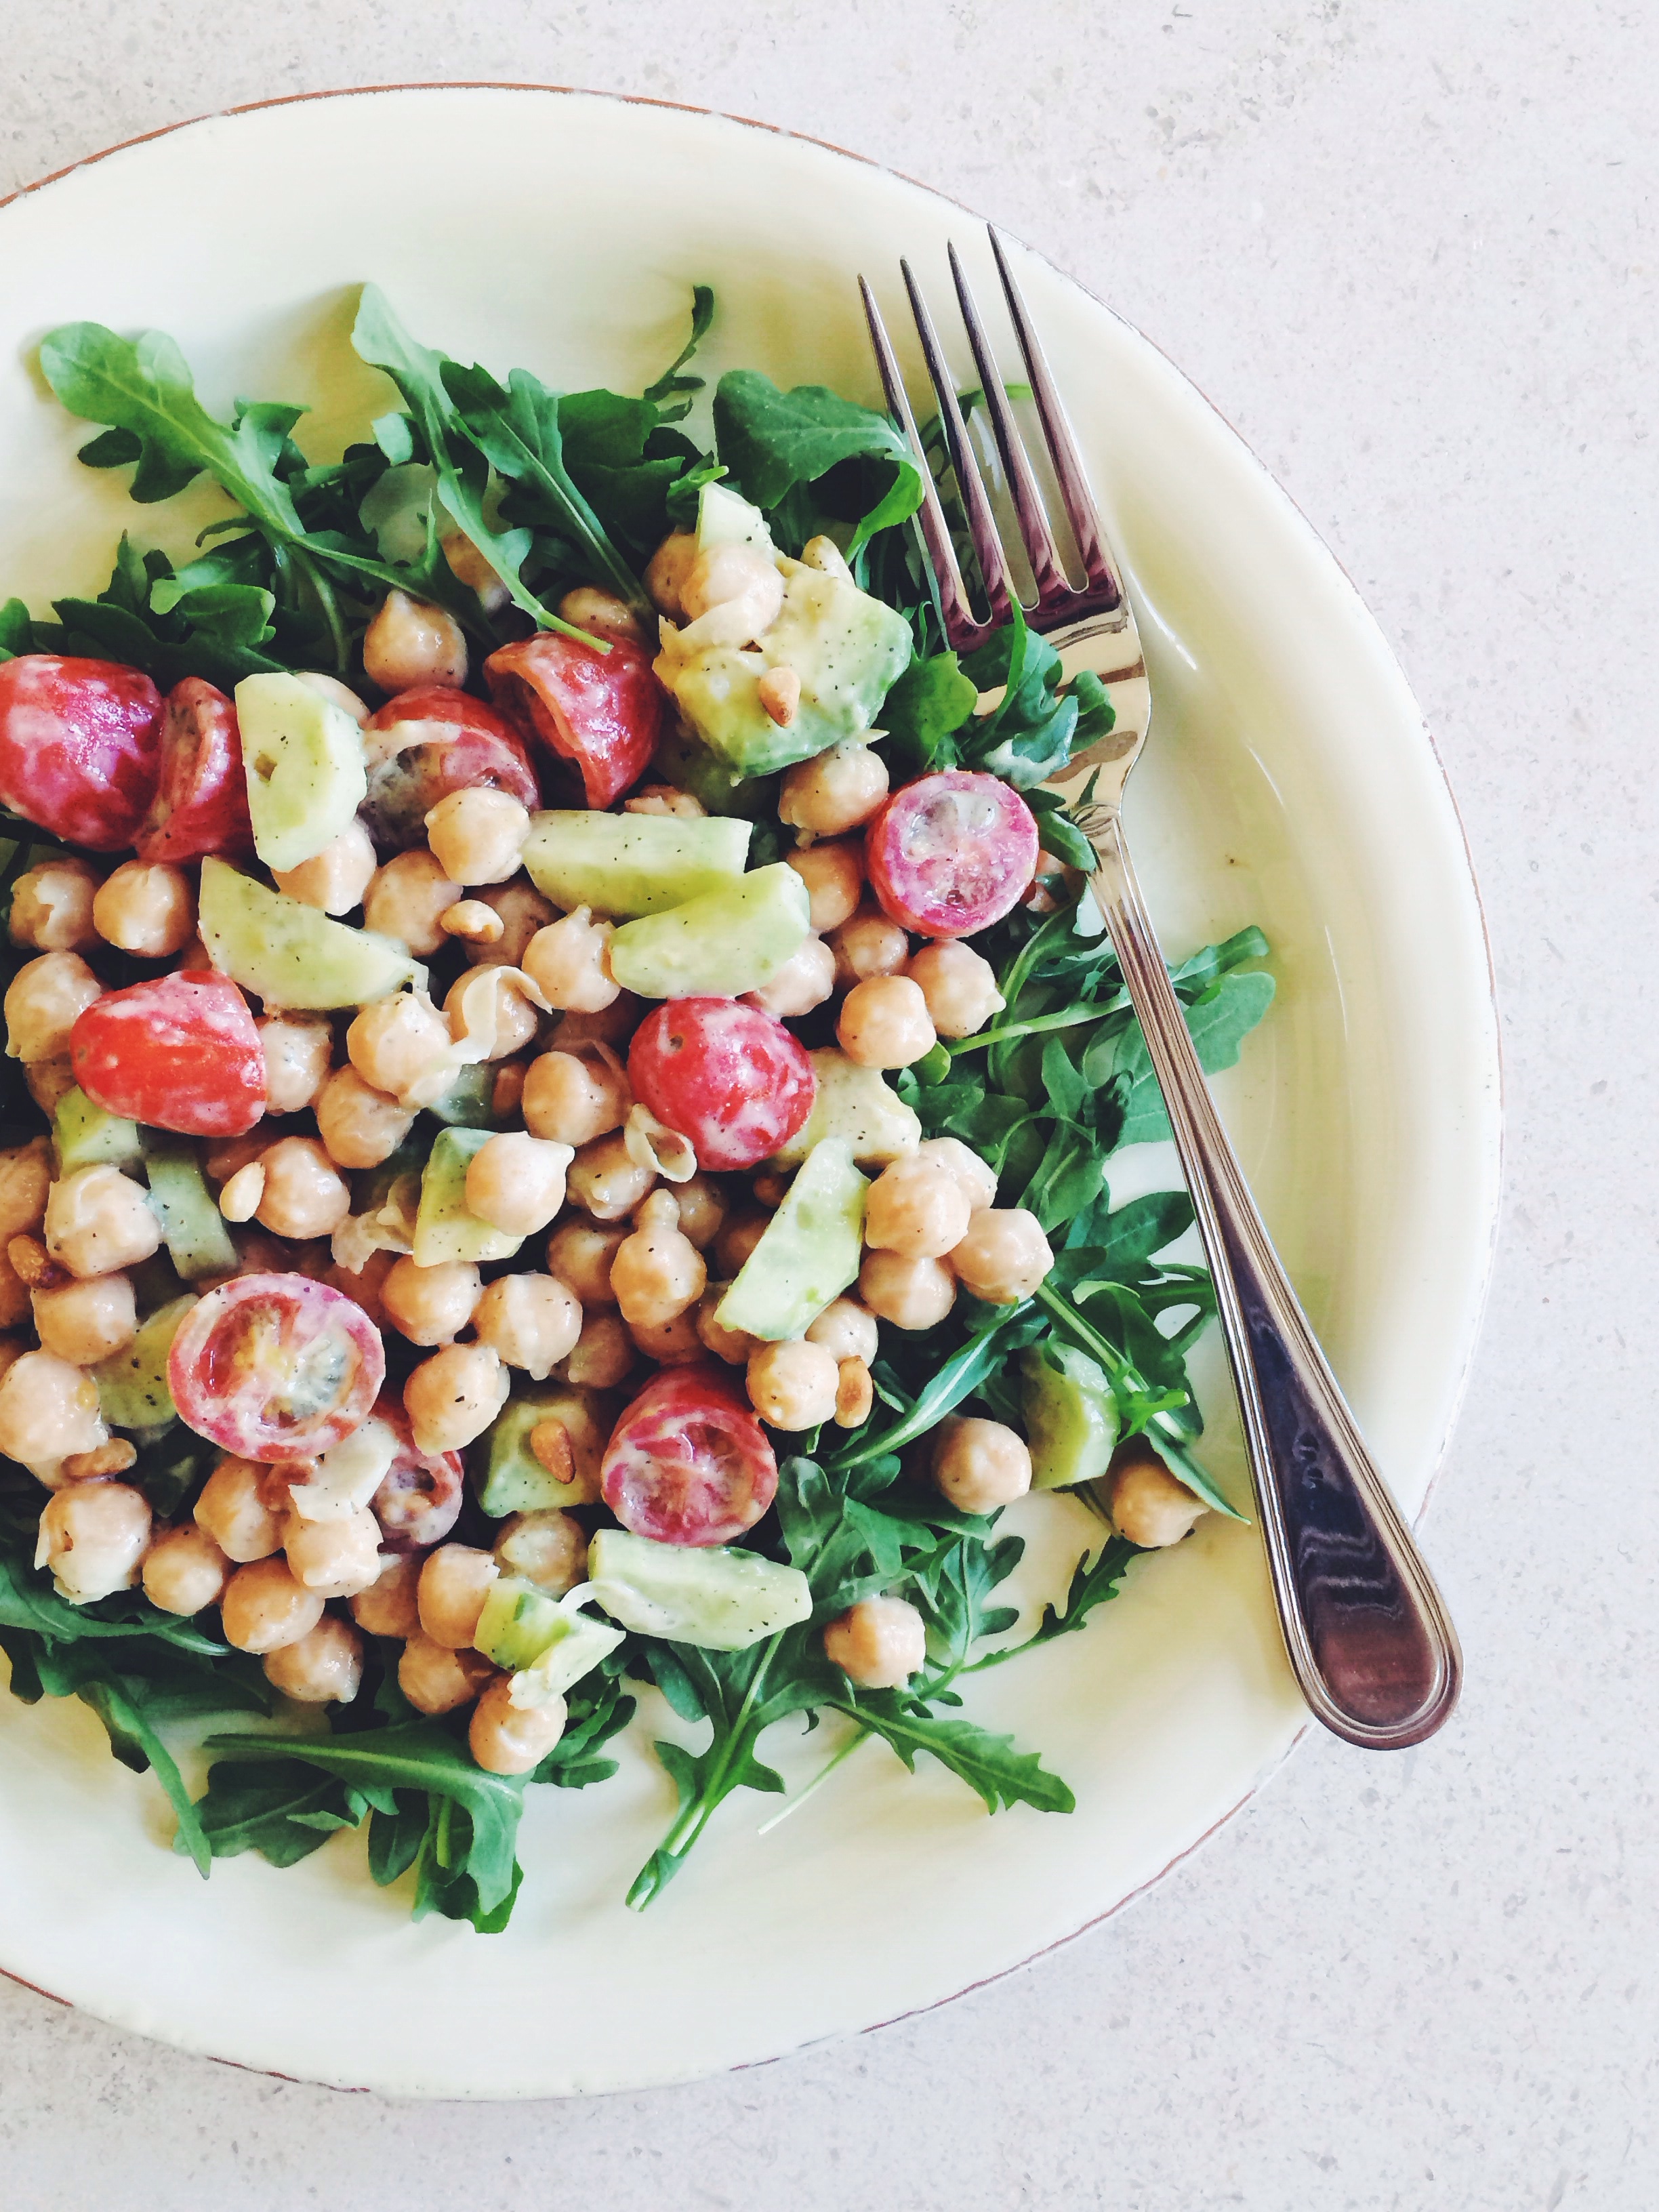
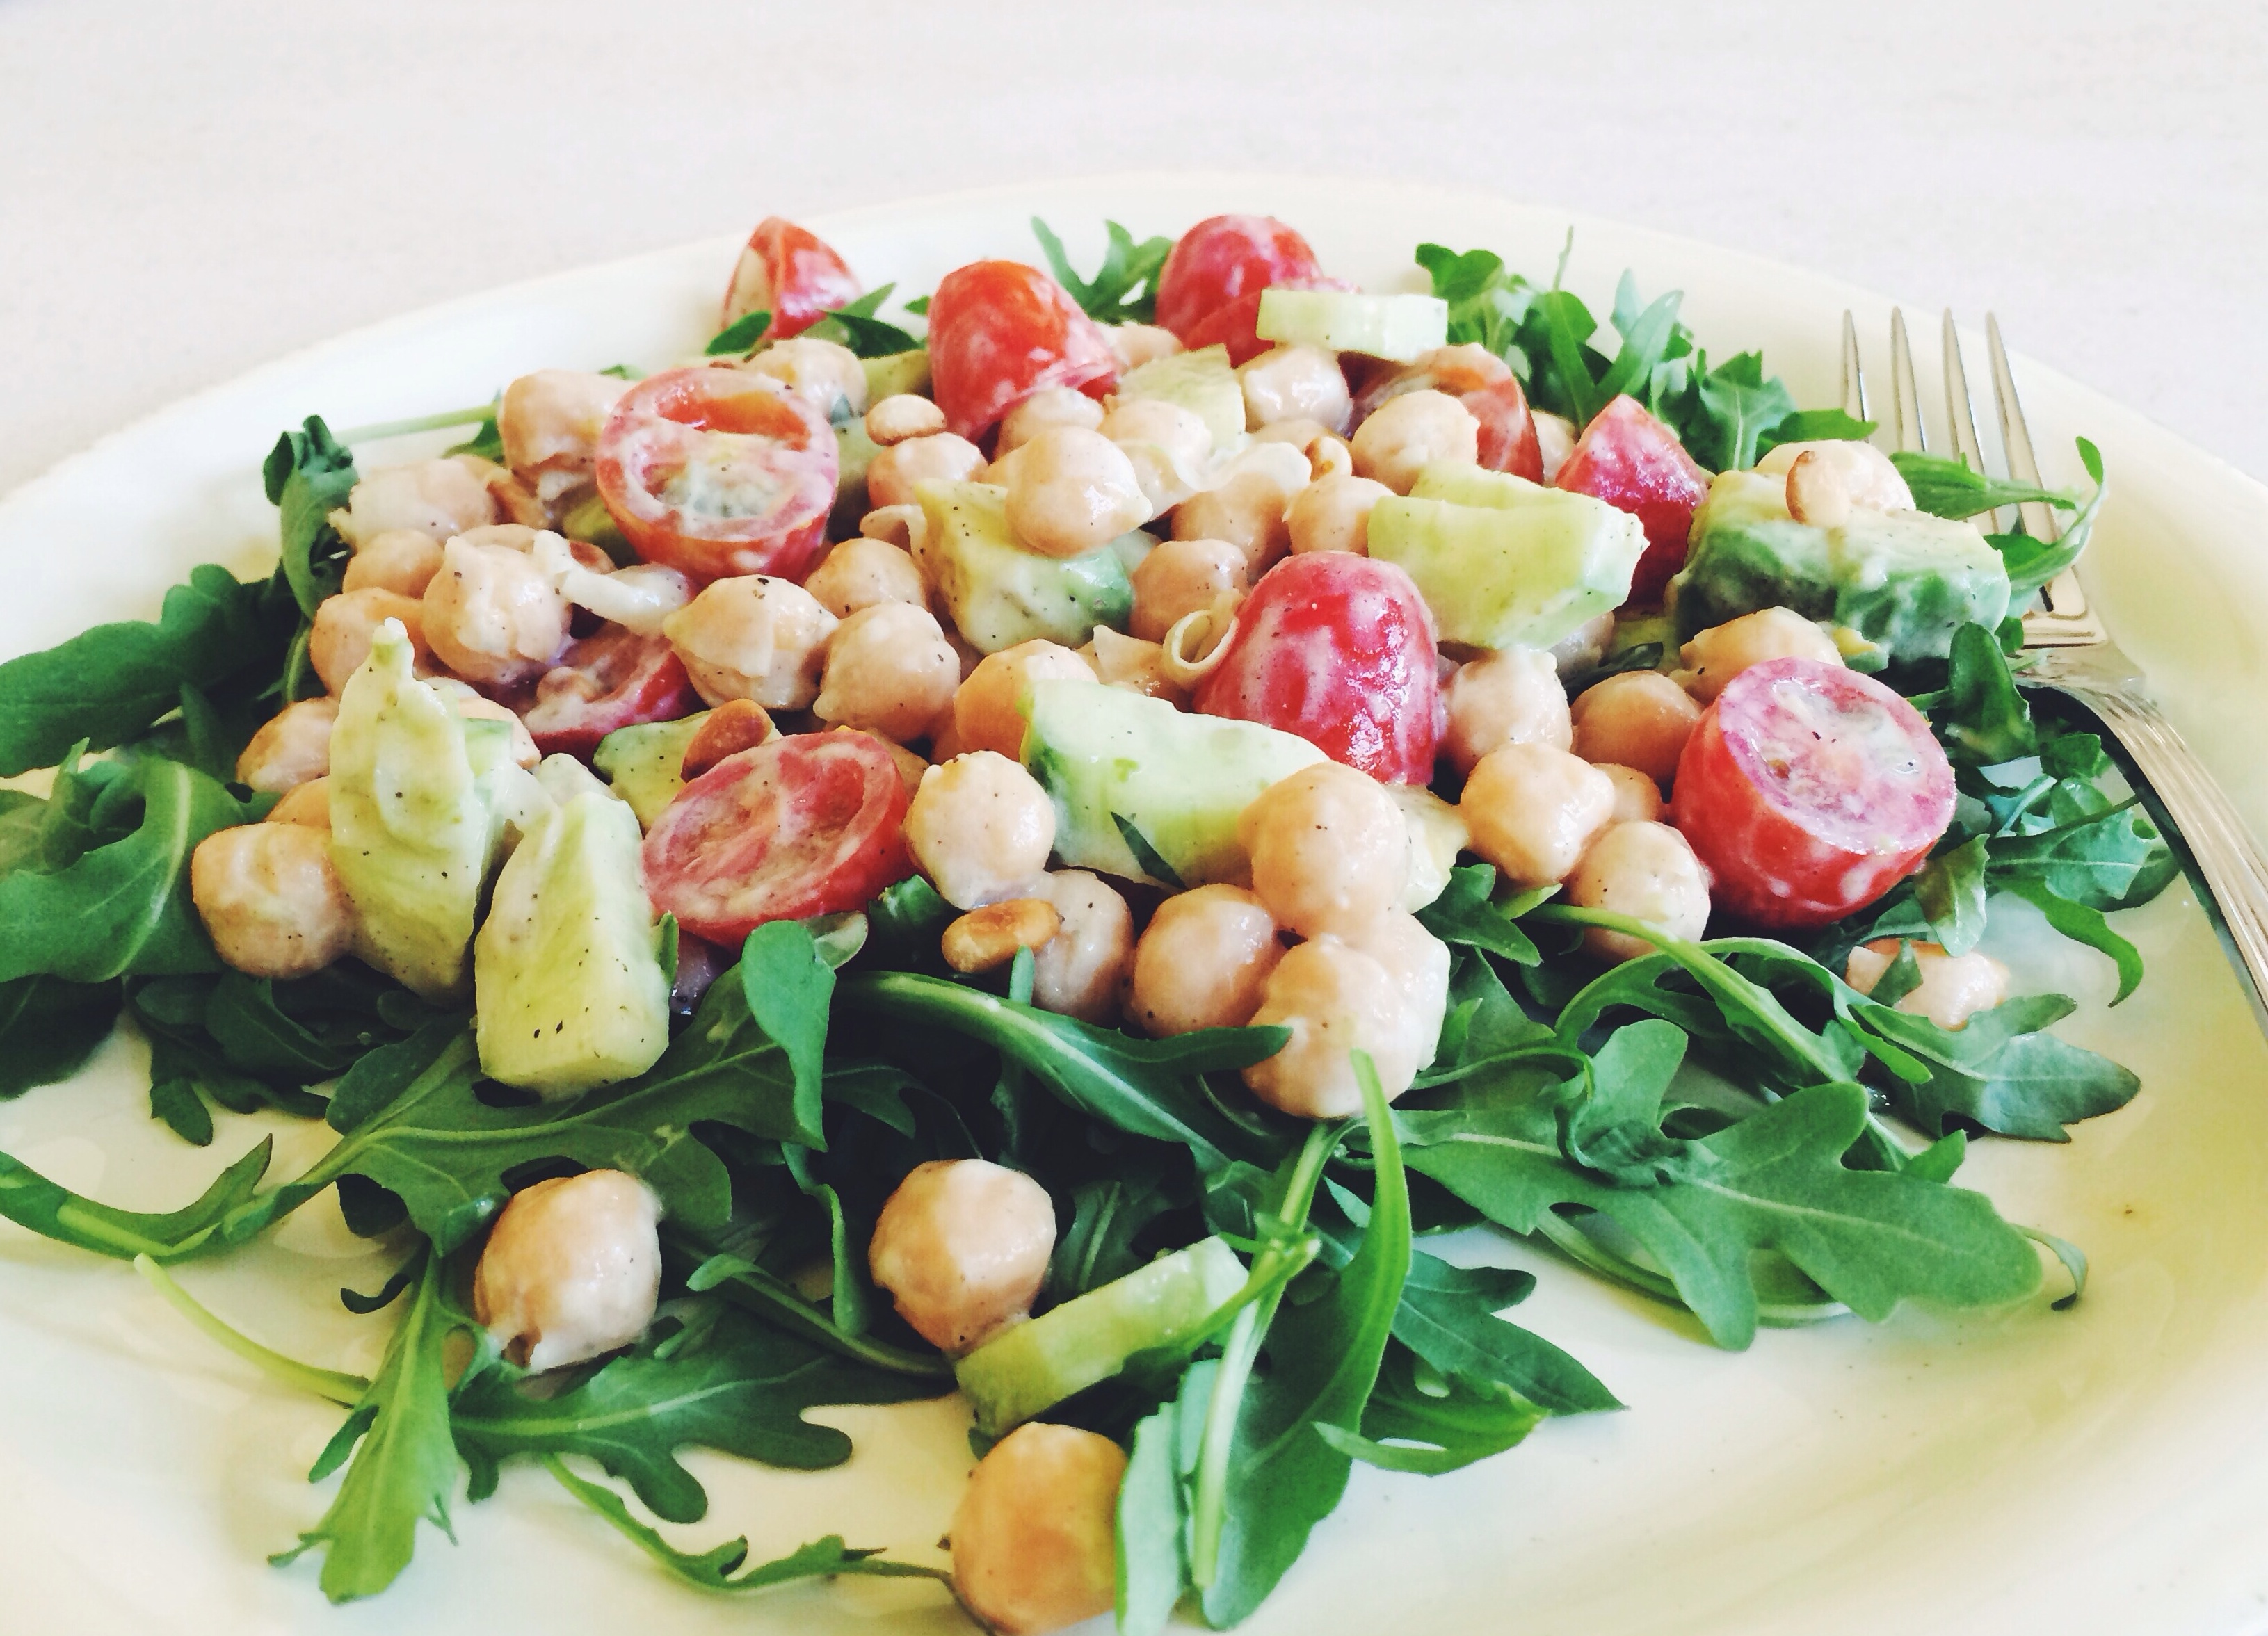
Finally, in keeping with the everyday theme, I took these photos using my iPhone camera. Traditional photo shoots can be tedious, a process more suited for a lazy Sunday morning than a Tuesday afternoon lunch break. So, for the first installment of “Everyday Eats,” I give you a Mediterranean-inspired chickpea salad. Fresh tomatoes and basil provide bursts of bright flavor, complemented by smoky toasted pine nuts and a creamy yogurt dressing.

image-16

Recipe by Maral Tavitian

For the salad:

  • 1 15 oz. can of cooked chickpeas
  • 1 cup of cherry tomatoes, sliced crosswise
  • 1/2 cup of cucumber slices (from about 2 medium cucumbers)
  • 1/2 avocado, cubed
  • 2 tblsp pine nuts, toasted
  • 2 cups arugula
  • Salt and pepper to taste

For the dressing:

  • 1/4 cup plain yogurt (not Greek, as it makes the dressing sour and thick)
  • 2 tsp of olive oil
  • 1 tblsp of lemon juice (from half a lemon)
  • 1 tblsp of basil ribbons
  • 1/4 tsp sea salt
  • Freshly ground pepper to taste

Yields 2 servings.

1. Drain the chickpeas in a colander and thoroughly pat dry with paper towels. Mix together tomatoes, cucumber, avocado, chickpeas, and pine nuts in a medium  bowl. Season generously with salt and pepper. To make the dressing, combine yogurt, olive oil, lemon juice, basil, salt, and pepper in a small bowl. Taste the dressing and adjust seasoning accordingly. Pour the dressing over the chickpea mixture in tablespoons, mixing just until the chickpea mixture is coated but not drowning in dressing. I had some dressing left over.

2. To plate, place one cup of arugula on each plate. Top with chickpea salad.

Adaptations: For a more Middle Eastern flavor, add 1/2 tsp cumin to the chickpea mixture. For an extra burst of sweetness, replace pine nuts with golden raisins. For added richness or if you’re really hungry, top the completed salad with an egg (fried, poached, soft-boiled). For extra crispness and robustness, roast the chickpeas with olive oil in a 400 degree oven until golden brown.

Bill Granger’s Coconut Bread

17 May

IMG_0632

Certain meals occupy a special place in my heart, not simply because of delicious food, but the memories that accompany these experiences. When my family and I traveled to Australia last year, we visited a Sydney breakfast institution called Bills.

Bill Granger, the restaurant’s owner and a prominent Aussie chef and cookbook author, emphasizes a fresh and easy-going approach to cooking. For breakfast, Bills specialties include silky scrambled eggs, cloud-like ricotta pancakes topped with bananas and honeycomb butter, and organic sourdough toast smothered with fruit preserves. Other than being one of the tastiest breakfasts I’ve ever had, Bills’s bustling, light-filled atmosphere and welcoming service encapsulated my trip to Australia.

IMG_0668-2

While Bills offers a short and simple menu, every dish was masterfully executed using high-quality ingredients. My family and I each ordered the famous scrambled eggs (there’s a reason the New York Times crowned Granger the “Egg Master of Sydney”), and selected this coconut bread as a sweet complement.

Despite its humble description, this loaf boasts rich coconut flavor and a tender, sturdy crumb. While it is wonderful enjoyed plain, Bills serves it grilled, cut in thick slabs, with a dollop of butter and honey on the side. Best of all, every bite transports me to that sunny morning spent in a foreign country, enjoying vibrant, unfussy food with the people I love.

Recipe courtesy of the New York Times, via Smitten Kitchen

  • 2 large eggs, at room temperature
  • 1 1/4 cups milk
  • 1 tsp vanilla extract
  • 2 1/2 cups all-purpose flour
  • 1/4 teaspoon salt
  • 2 tsp baking powder
  • 1 to 2 tsp ground cinnamon
  • 1 cup granulated sugar
  • 5 ounces sweetened flaked coconut (about 1 1/2 cups)
  • 6 tblsp unsalted butter, melted or melted and browned, if desired
  • Vegetable oil or nonstick cooking spray for baking pan

1. Preheat oven to 350 degrees F. In a small bowl, whisk together eggs, milk and vanilla.

2. In a medium bowl, sift together flour, salt, baking powder and cinnamon. Add sugar and coconut, and stir to mix. Make a well in the center, and pour in egg mixture, then stir wet and dry ingredients together until just combined. Add butter, and stir until just smooth — be careful not to overmix.

3. Butter and flour a 9×5-inch loaf pan, or coat it with a nonstick spray. Spread batter in pan and bake until a toothpick inserted into the center comes out clean, anywhere from 1 to 1 1/4 hours. Cool in pan five minutes, before turning out onto a cooling rack.

Cardamom-Lemon Sticky Buns

6 May

IMG_0490-2

I have a love-hate relationship with social media. With Instagram, whenever I enjoy a delicious meal or notice something pretty on the street, I immediately reach for my iPhone camera. While I love capturing beautiful photos of special moments, I recognize the constant pressure to share that accompanies this platform. Through publishing photos, users validate the importance of their experiences, measuring positive reinforcement through ‘likes.’

IMG_0487-2

While making these buns, I stopped intermittently to snap photos. I climbed on top of chairs to achieve the perfect angle and even paraded around my house with a hot pan in order to find ideal light. Even though I am smitten with the final product, this hilariously arduous photo shoot hindered me from fully enjoying the baking process.

While I do not plan to delete my Instagram account, it is important for me to be aware of social media’s impacts. That being said, now we can talk about these sticky buns! The combination of fragrant cardamom, lemon, and warm yeast created an intoxicating smell while baking, and made for a more sophisticated flavor than the traditional cinnamon variety. While somewhat time-consuming, the techniques are relatively simple. Be patient with rising times and do not overwork the dough. You can even shape the buns then allow them to rise overnight, a standout dish for weekend breakfast or brunch.

Recipe slightly adapted from Food52.com

I found the lemon glaze from the original recipe to be quite sour. Instead, I’ve included a simple cream cheese glaze, which I think would offset the tanginess of the citrus. 

For the sticky bun dough:

  • 3/4 cups whole or 2% milk, just warm to the touch
  • 1/2 cup (1 stick) unsalted butter, melted and cooled 
  • 1/3 cup granulated sugar
  • 2 1/4 tsp active dry yeast
  • 1 tsp salt
  • 2 tsp ground cardamom (preferably freshly ground)
  • large egg, beaten
  • cups (approximately) all purpose flour (plus more as needed)

For the filling:

I only used about half of these ingredients. Two tablespoons of butter and 1/3 cup of lemon-sugar were enough to coat the dough. 

  • 2/3 cups granulated sugar
  • tblsp fresh lemon zest (from about 3 large lemons)
  • 4 tblsp very soft butter

For the cream cheese glaze:

  • 1/4 cup cream cheese, softened
  • 3 tblsp milk (if you prefer a hint of lemon flavor, replace one tablespoon of milk with lemon juice)
  • 1 1/2 cups powdered sugar (or enough to make a glaze consistency), sifted
  • Toasted pecan pieces, for topping (optional)

Yields about 14 buns.

1. Combine the warm milk, melted butter, and sugar in a large mixing bowl or in the bowl of a stand mixer. Stir in the yeast and let it sit until the yeast is foamy, about 7-10 minutes. Then, stir in the salt, cardamom, and beaten egg.

2. Stir in 2 cups of flour. Gradually add rest of flour little by little, until the dough feels sticky to the touch but doesn’t actually stick to your fingers. You want to avoid adding too much flour as this will keep the dough from rising as well as it could (I had about 1/4 cup left over). Knead the dough in a mixer on medium-low speed with a bread hook for about 6 minutes or by hand on a lightly floured surface for 10 minutes.

3. Transfer the dough to a lightly oiled bowl, cover it with plastic wrap or a damp kitchen towel, and set somewhere warm to rise until doubled in size, about 2 hours. Proceed with making the filling and assembling the buns.

4. While the bun dough is rising, mix together the granulated sugar and lemon zest and set aside. Grease two 8-inch round cake pans (or a 9X13 pan). After the dough has risen, take it out of the bowl and on a lightly floured surface roll it into a large rectangle about 1/4-inch thick. Spread the dough rectangle with the soft butter, then sprinkle it evenly with the sugar-zest mixture.

5. Roll the rectangle up lengthwise into a long jellyroll. Slice it with a sharp serrated knife into 1-inch thick pieces. Arrange the pieces in the prepared baking pans, leaving a little space around them for them to rise and grow. Cover and place in a warm place to rise until doubled in size, about another hour. Or, put the rolls in the refrigerator to slowly rise overnight. Take them out in the morning. If they haven’t risen much in the fridge, let them come to room temperature and give them a few hours to rise.

6. When the rolls are almost finished rising, heat your oven to 350 degrees F. Bake the rolls in the oven until golden brown, about 25 minutes. Take them out and allow them to cool to lukewarm before drizzling with the glaze. While the glaze is wet, top with pecan pieces for extra crunch and flavor contrast.

7. To make the glaze, whisk together the milk, lemon juice (if using) with powdered sugar until it reaches glaze consistency. Drizzle over the sticky buns. These buns are best eaten the day they’re made, though they rewarm relatively well. If you want to keep them longer, you can take them as soon as they’ve cooled to room temperature, wrap them well in tinfoil and stick them in the freezer. Let them defrost at room temperature and gently rewarm them in the oven before serving.