Tag Archives: recipe

Toasted Coconut Muesli

10 Dec

IMG_1614

I can hardly believe that half of my sophomore year is already over. It seems like just yesterday that I was hopping on a plane to New York for my summer internship, and now I am already sending out applications for next summer. It’s been a while since I have contributed to this space, and for good reason. This past semester was filled with exciting new projects and responsibilities, a packed class schedule, and time spent trying to find my niche on campus. I certainly haven’t forgotten about Let’s Live La Vida, but it has taken a back seat in the past few months.

IMG_1618

With any creative endeavor, it is so important to expose yourself to new perspectives and ways of capturing a subject. I have wrestled with DSLR photography for years, vacillating in my approach while never being entirely satisfied with the results.

I recently spent an afternoon with my uncle Avo, an excellent photographer with a very organic style, to observe his approach towards food photography. His creative spontaneity is the perfectly foil to my fastidious and careful manner. I knew working with him would allow me to depart from my perfectionist mentality.

While I have always tried to display food in its simplest form, my uncle showed me how to let the subject speak for itself. Rather than fuss with styling minutia, vibrant color and light are all you need to create a beautiful and intriguing image.

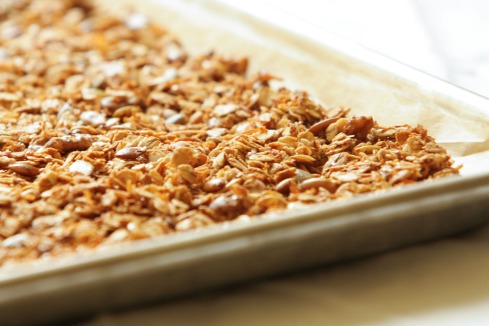
I picked up my camera again this morning and applied some of my newfound skills. Megan Gordon, author of the lovely breakfast cookbook Whole Grain Mornings, introduced me to this recipe for toasted coconut muesli. A lighter, less oily version of granola, muesli has become a staple in my pantry. I love that it is not too sweet, with just the right amount of crunch to liven up a bowl of yogurt.

Recipe barely adapted from Whole Grain Mornings by Megan Gordon

Megan recommends stirring in the dried mango once the muesli has cooled on the baking sheet. To prevent the dried fruit from getting too hard, I like to mix it in separately for each serving. 

  • 2 1/4 cups rolled oats
  • 1/4 cup wheat bran
  • 1/2 cup unsweetened shredded coconut
  • 1/2 cup raw pumpkin seeds
  • 1/2 cup coarsely chopped walnuts
  • 1/4 teaspoon cinnamon
  • 1/4 teaspoon ground cardamom (optional)
  • 1/4 teaspoon salt
  • 2 tablespoons coconut or olive oil
  • 1/4 cup honey
  • 1/2 cup dried mango or other dried fruit of choice (optional)

Yields about 3 cups.

1. Preheat the oven to 325 degrees Fahrenheit. Line a rimmed baking sheet with parchment paper. In a large bowl, toss together the rolled oats, wheat bran, coconut, pumpkin seeds, walnuts, cinnamon, cardamom, and salt.

2. Heat the coconut oil and honey in a small saucepan over low heat until warmed. Pour the mixture over the dry ingredients and stir until everything is evenly coated. Spread evenly across the prepared baking sheet and bake until golden brown, about 20-25 minutes. Remove from the oven and let cool completely on baking sheet. Stir in dried fruit, if using.
Introducing “The Epicurean Dorm”

28 Aug

IMG_0875

When I started my Freshman year of college, balancing academics, extracurricular activities, and socializing while eating healthfully proved to be a considerable feat. Not only did I have less time to spend in the kitchen, but my limited access to fancy equipment and ingredients affected my choice of recipes. Discovering recipes that accommodated my new lifestyle was a learning process, but my love of cooking and homemade food encouraged me to make the commitment.

IMG_0837

After sharing my experiences with friends and peers, I found that many people faced a similar dilemma. It turns out that college students long to cook for themselves but find the prospect completely overwhelming. So, after months of writing, planning, and testing recipes, I am thrilled to announce “The Epicurean Dorm,” my new column in USC’s Daily Trojan newspaper. Every week, I will share simple, healthy, and affordable recipes to encourage college students to cook delicious food from scratch. While I created this column with college students in mind, any one with an interest in learning to cook may benefit.

IMG_0857

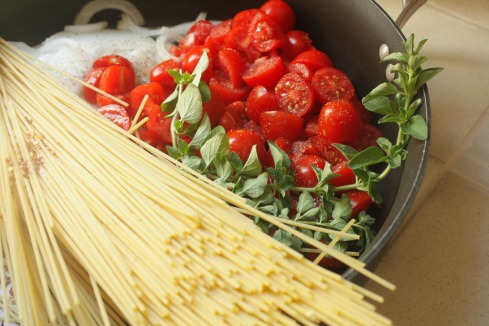
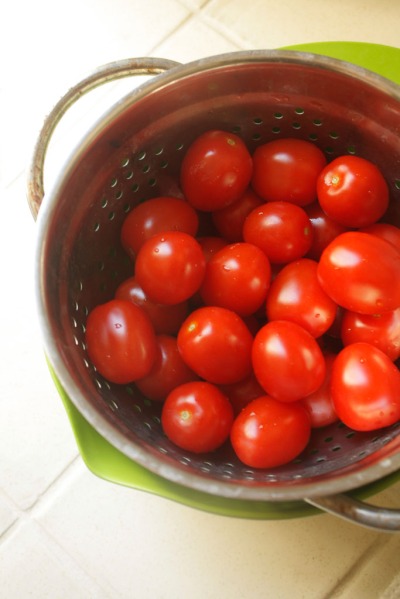
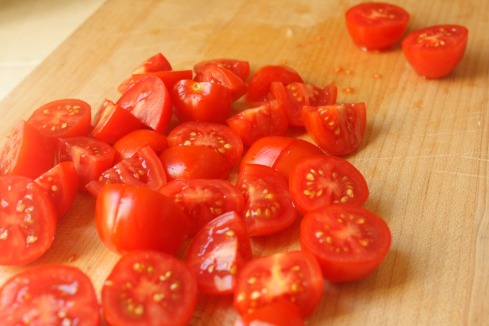
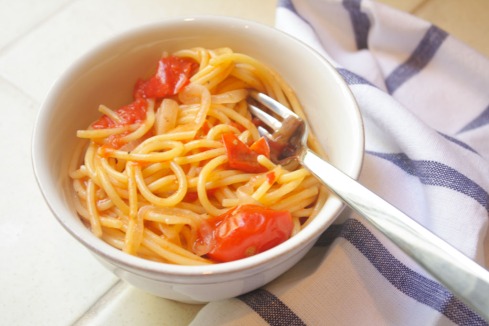
First up: an outstanding, hassle-free pasta with tomato sauce. Simply place all of the ingredients in one pan and stir them together over high heat for nine minutes. The end result is perfectly al dente spaghetti immersed in a luxurious and deeply flavorful sauce. Head over to Daily Trojan for the recipe and full story.

If you make any recipe from The Epicurean Dorm, tag your photos with #theepicureandorm and share them with me on Facebook or Instagram @maral_lavida.

IMG_0917

Everyday Eats: Lentil Salad with Peanut Dressing and Summer in NYC

18 Jul

Processed with VSCOcam with f2 preset

If you follow me on Instagram, you may have noticed a change in my posting patterns. Gone are the bright afternoon photos of homemade salads and freshly baked goods. Weekday posts are scarce, pictures of my usual Los Angeles hangouts replaced with those of decadent weekend brunches in Downtown Manhattan.

At the end of May, I moved from Los Angeles to New York City for a summer internship at Food & Wine Magazine. I cannot begin to explain all that has happened in the past two months–the lessons learned, friendships made, and delicious food eaten. What I can say now, though, is how much I miss cooking.

Processed with VSCOcam with c1 preset

I live with my cousin in a 300 square foot apartment in Midtown, our kitchenette equipped with nothing but a microwave and a miniature refrigerator. While eating out is a large part of the lifestyle here in New York, bars and restaurants bustling with people late into the night, it gets exhausting. I long for the leisurely hours spent flipping through cookbooks, baking cookies and cakes or tossing together fresh produce for simple summer salads. With its bounty of vibrant fruits and vegetables, summer is a much-anticipated season for cooks and bakers alike.

IMG_2449

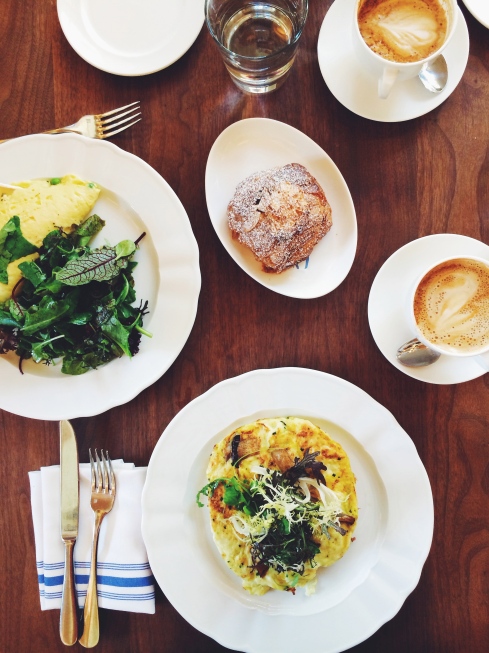
Australian-inspired breakfast and coffee at Little Collins Café.

Processed with VSCOcam with f2 preset

Stellar brunch at Lafayette in NoHo. Try the chocolate-banana-coconut croissant.

Processed with VSCOcam with c1 preset

Lusting after sweet, dainty strawberries at the Union Square Farmers’ Market.

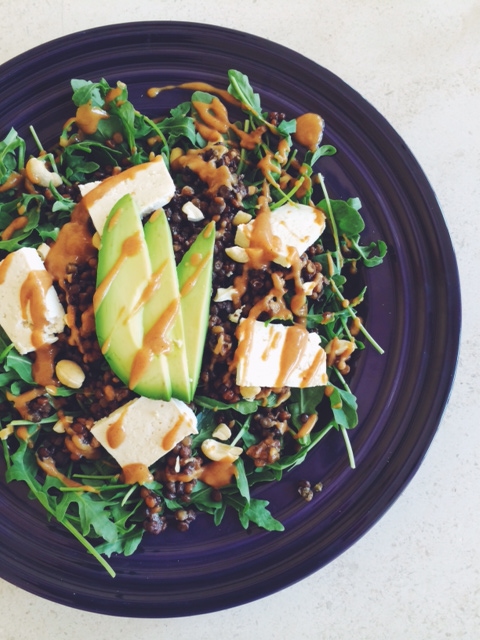
I made this salad on a lazy afternoon a few days before my departure. I was in the mood for a change and deviated from my usual drizzle of olive oil and lemon juice, creating a delicious Asian-inspired dressing using just a few pantry staples. A single ingredient, or in this case, dressing, can completely transform the flavors of a dish.

The creamy peanut dressing pairs well with hearty lentils and crisp arugula, but would be a welcome addition to shrimp spring rolls or a cold soba noodle salad. The recipe is more of a framework than a strict guideline, so feel free to improvise with whichever combination of lettuce, vegetables, and protein suits your fancy.

Recipe by Maral Tavitian

For the salad:

  • 1 1/2 cups arugula
  • 3/4 cup steamed green lentils, drained and cooled
  • 1/4 of an avocado, thinly sliced
  • 2 oz. medium-firm tofu, drained and sliced 1/2-inch thick
  • Handful of toasted cashew pieces, for garnish
  • Salt and freshly ground pepper to taste

For the peanut dressing:

  • 2 tablespoons unsalted creamy peanut butter*
  • 1 tablespoon unseasoned rice vinegar
  • Juice from 1/2 a lemon
  • 1 teaspoon soy sauce
  • 1 teaspoon honey
  • 1 1/2 tablespoons vegetable or other neutral-tasting oil
  • Pinch of crushed red pepper flakes (optional)

* Use a good-quality peanut butter with a loose consistency. Look for brands that have only one ingredient (peanuts) and a layer of oil on top.

1. Place the lentils on top of the bed of arugula. Top with avocado slices, tofu, and cashew pieces. Season with salt and pepper to taste. For the dressing, combine the peanut butter, vinegar, lemon juice, soy sauce, and honey in a small bowl using a whisk or fork. Slowly drizzle in the oil, whisking to combine until the dressing reaches a smooth consistency. If the dressing seems too thick, add a bit more oil or water. Drizzle the dressing over the salad. Extra dressing can be refrigerated in an airtight container for up to one week.

Bill Granger’s Coconut Bread

17 May

IMG_0632

Certain meals occupy a special place in my heart, not simply because of delicious food, but the memories that accompany these experiences. When my family and I traveled to Australia last year, we visited a Sydney breakfast institution called Bills.

Bill Granger, the restaurant’s owner and a prominent Aussie chef and cookbook author, emphasizes a fresh and easy-going approach to cooking. For breakfast, Bills specialties include silky scrambled eggs, cloud-like ricotta pancakes topped with bananas and honeycomb butter, and organic sourdough toast smothered with fruit preserves. Other than being one of the tastiest breakfasts I’ve ever had, Bills’s bustling, light-filled atmosphere and welcoming service encapsulated my trip to Australia.

IMG_0668-2

While Bills offers a short and simple menu, every dish was masterfully executed using high-quality ingredients. My family and I each ordered the famous scrambled eggs (there’s a reason the New York Times crowned Granger the “Egg Master of Sydney”), and selected this coconut bread as a sweet complement.

Despite its humble description, this loaf boasts rich coconut flavor and a tender, sturdy crumb. While it is wonderful enjoyed plain, Bills serves it grilled, cut in thick slabs, with a dollop of butter and honey on the side. Best of all, every bite transports me to that sunny morning spent in a foreign country, enjoying vibrant, unfussy food with the people I love.

Recipe courtesy of the New York Times, via Smitten Kitchen

  • 2 large eggs, at room temperature
  • 1 1/4 cups milk
  • 1 tsp vanilla extract
  • 2 1/2 cups all-purpose flour
  • 1/4 teaspoon salt
  • 2 tsp baking powder
  • 1 to 2 tsp ground cinnamon
  • 1 cup granulated sugar
  • 5 ounces sweetened flaked coconut (about 1 1/2 cups)
  • 6 tblsp unsalted butter, melted or melted and browned, if desired
  • Vegetable oil or nonstick cooking spray for baking pan

1. Preheat oven to 350 degrees F. In a small bowl, whisk together eggs, milk and vanilla.

2. In a medium bowl, sift together flour, salt, baking powder and cinnamon. Add sugar and coconut, and stir to mix. Make a well in the center, and pour in egg mixture, then stir wet and dry ingredients together until just combined. Add butter, and stir until just smooth — be careful not to overmix.

3. Butter and flour a 9×5-inch loaf pan, or coat it with a nonstick spray. Spread batter in pan and bake until a toothpick inserted into the center comes out clean, anywhere from 1 to 1 1/4 hours. Cool in pan five minutes, before turning out onto a cooling rack.

Cardamom-Lemon Sticky Buns

6 May

IMG_0490-2

I have a love-hate relationship with social media. With Instagram, whenever I enjoy a delicious meal or notice something pretty on the street, I immediately reach for my iPhone camera. While I love capturing beautiful photos of special moments, I recognize the constant pressure to share that accompanies this platform. Through publishing photos, users validate the importance of their experiences, measuring positive reinforcement through ‘likes.’

IMG_0487-2

While making these buns, I stopped intermittently to snap photos. I climbed on top of chairs to achieve the perfect angle and even paraded around my house with a hot pan in order to find ideal light. Even though I am smitten with the final product, this hilariously arduous photo shoot hindered me from fully enjoying the baking process.

While I do not plan to delete my Instagram account, it is important for me to be aware of social media’s impacts. That being said, now we can talk about these sticky buns! The combination of fragrant cardamom, lemon, and warm yeast created an intoxicating smell while baking, and made for a more sophisticated flavor than the traditional cinnamon variety. While somewhat time-consuming, the techniques are relatively simple. Be patient with rising times and do not overwork the dough. You can even shape the buns then allow them to rise overnight, a standout dish for weekend breakfast or brunch.

Recipe slightly adapted from Food52.com

I found the lemon glaze from the original recipe to be quite sour. Instead, I’ve included a simple cream cheese glaze, which I think would offset the tanginess of the citrus. 

For the sticky bun dough:

  • 3/4 cups whole or 2% milk, just warm to the touch
  • 1/2 cup (1 stick) unsalted butter, melted and cooled 
  • 1/3 cup granulated sugar
  • 2 1/4 tsp active dry yeast
  • 1 tsp salt
  • 2 tsp ground cardamom (preferably freshly ground)
  • large egg, beaten
  • cups (approximately) all purpose flour (plus more as needed)

For the filling:

I only used about half of these ingredients. Two tablespoons of butter and 1/3 cup of lemon-sugar were enough to coat the dough. 

  • 2/3 cups granulated sugar
  • tblsp fresh lemon zest (from about 3 large lemons)
  • 4 tblsp very soft butter

For the cream cheese glaze:

  • 1/4 cup cream cheese, softened
  • 3 tblsp milk (if you prefer a hint of lemon flavor, replace one tablespoon of milk with lemon juice)
  • 1 1/2 cups powdered sugar (or enough to make a glaze consistency), sifted
  • Toasted pecan pieces, for topping (optional)

Yields about 14 buns.

1. Combine the warm milk, melted butter, and sugar in a large mixing bowl or in the bowl of a stand mixer. Stir in the yeast and let it sit until the yeast is foamy, about 7-10 minutes. Then, stir in the salt, cardamom, and beaten egg.

2. Stir in 2 cups of flour. Gradually add rest of flour little by little, until the dough feels sticky to the touch but doesn’t actually stick to your fingers. You want to avoid adding too much flour as this will keep the dough from rising as well as it could (I had about 1/4 cup left over). Knead the dough in a mixer on medium-low speed with a bread hook for about 6 minutes or by hand on a lightly floured surface for 10 minutes.

3. Transfer the dough to a lightly oiled bowl, cover it with plastic wrap or a damp kitchen towel, and set somewhere warm to rise until doubled in size, about 2 hours. Proceed with making the filling and assembling the buns.

4. While the bun dough is rising, mix together the granulated sugar and lemon zest and set aside. Grease two 8-inch round cake pans (or a 9X13 pan). After the dough has risen, take it out of the bowl and on a lightly floured surface roll it into a large rectangle about 1/4-inch thick. Spread the dough rectangle with the soft butter, then sprinkle it evenly with the sugar-zest mixture.

5. Roll the rectangle up lengthwise into a long jellyroll. Slice it with a sharp serrated knife into 1-inch thick pieces. Arrange the pieces in the prepared baking pans, leaving a little space around them for them to rise and grow. Cover and place in a warm place to rise until doubled in size, about another hour. Or, put the rolls in the refrigerator to slowly rise overnight. Take them out in the morning. If they haven’t risen much in the fridge, let them come to room temperature and give them a few hours to rise.

6. When the rolls are almost finished rising, heat your oven to 350 degrees F. Bake the rolls in the oven until golden brown, about 25 minutes. Take them out and allow them to cool to lukewarm before drizzling with the glaze. While the glaze is wet, top with pecan pieces for extra crunch and flavor contrast.

7. To make the glaze, whisk together the milk, lemon juice (if using) with powdered sugar until it reaches glaze consistency. Drizzle over the sticky buns. These buns are best eaten the day they’re made, though they rewarm relatively well. If you want to keep them longer, you can take them as soon as they’ve cooled to room temperature, wrap them well in tinfoil and stick them in the freezer. Let them defrost at room temperature and gently rewarm them in the oven before serving.