Tag Archives: baking

Toasted Coconut Muesli

10 Dec

IMG_1614

I can hardly believe that half of my sophomore year is already over. It seems like just yesterday that I was hopping on a plane to New York for my summer internship, and now I am already sending out applications for next summer. It’s been a while since I have contributed to this space, and for good reason. This past semester was filled with exciting new projects and responsibilities, a packed class schedule, and time spent trying to find my niche on campus. I certainly haven’t forgotten about Let’s Live La Vida, but it has taken a back seat in the past few months.

IMG_1618

With any creative endeavor, it is so important to expose yourself to new perspectives and ways of capturing a subject. I have wrestled with DSLR photography for years, vacillating in my approach while never being entirely satisfied with the results.

I recently spent an afternoon with my uncle Avo, an excellent photographer with a very organic style, to observe his approach towards food photography. His creative spontaneity is the perfectly foil to my fastidious and careful manner. I knew working with him would allow me to depart from my perfectionist mentality.

While I have always tried to display food in its simplest form, my uncle showed me how to let the subject speak for itself. Rather than fuss with styling minutia, vibrant color and light are all you need to create a beautiful and intriguing image.

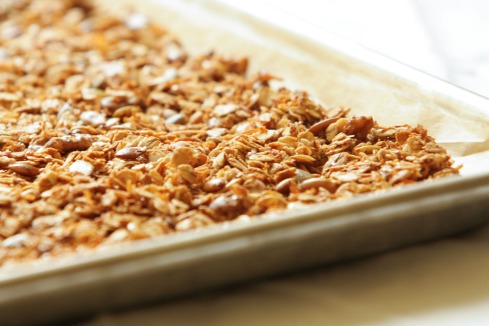
I picked up my camera again this morning and applied some of my newfound skills. Megan Gordon, author of the lovely breakfast cookbook Whole Grain Mornings, introduced me to this recipe for toasted coconut muesli. A lighter, less oily version of granola, muesli has become a staple in my pantry. I love that it is not too sweet, with just the right amount of crunch to liven up a bowl of yogurt.

Recipe barely adapted from Whole Grain Mornings by Megan Gordon

Megan recommends stirring in the dried mango once the muesli has cooled on the baking sheet. To prevent the dried fruit from getting too hard, I like to mix it in separately for each serving. 

  • 2 1/4 cups rolled oats
  • 1/4 cup wheat bran
  • 1/2 cup unsweetened shredded coconut
  • 1/2 cup raw pumpkin seeds
  • 1/2 cup coarsely chopped walnuts
  • 1/4 teaspoon cinnamon
  • 1/4 teaspoon ground cardamom (optional)
  • 1/4 teaspoon salt
  • 2 tablespoons coconut or olive oil
  • 1/4 cup honey
  • 1/2 cup dried mango or other dried fruit of choice (optional)

Yields about 3 cups.

1. Preheat the oven to 325 degrees Fahrenheit. Line a rimmed baking sheet with parchment paper. In a large bowl, toss together the rolled oats, wheat bran, coconut, pumpkin seeds, walnuts, cinnamon, cardamom, and salt.

2. Heat the coconut oil and honey in a small saucepan over low heat until warmed. Pour the mixture over the dry ingredients and stir until everything is evenly coated. Spread evenly across the prepared baking sheet and bake until golden brown, about 20-25 minutes. Remove from the oven and let cool completely on baking sheet. Stir in dried fruit, if using.
Ma’amoul Cookies from my Great Aunt’s Armenian Vegan Cookbook

2 Jun

IMG_0708

While my family has always appreciated good meals, as a child, I seldom spent time in the kitchen. I cultivated my interest in food independently, experimenting with recipes, photographing, and sharing these experiences on my blog. As I grew older, my love of food and my Armenian heritage became defining aspects of my identity. I longed to learn about traditional Armenian cuisine, but did not know where to begin. That was until my great aunt, Dikranouhi Kirazian, released her new cookbook entitled Armenian Vegan. 

IMG_0726

IMG_0722

Armenian Vegan contains more than 200 traditional Armenian recipes, including appetizers, breads, main courses, and desserts, using no animal products. For seven years, my aunt secretly labored over this book with the help of her husband, George. She told no one about the project, leaving my extended family in shock upon receiving copies in the mail.

I relished flipping through the pages, discovering recipes that I had never heard of before along with vegan adaptations of classic dishes. Dikranouhi presents a practical and healthy approach to cooking, with simple instructions and ingredients accessible to novice cooks. She writes thoughtfully, sharing personal anecdotes and the cultural significance behind certain foods.

IMG_0730

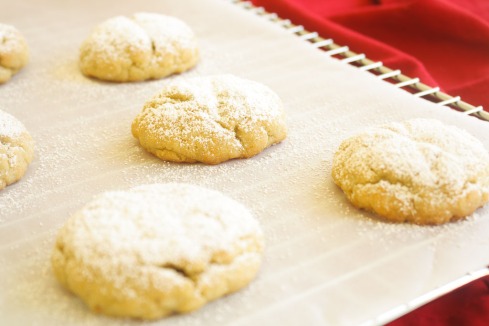
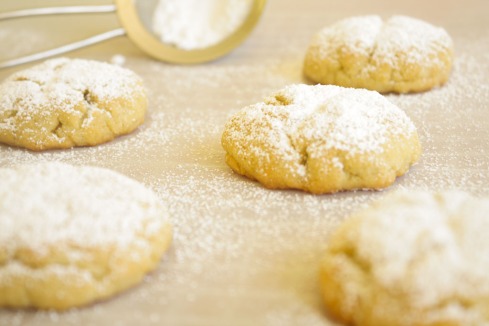
While reading the dessert section, these walnut-stuffed cookies caught my eye. Flavored with Mahlab, ground cherry pits, and delicate rose water, Ma’amoul are ubiquitous throughout the Middle East. I substituted a few ingredients based on what I had on hand, replacing Mahlab with ground cardamom and rose water with orange blossom water.

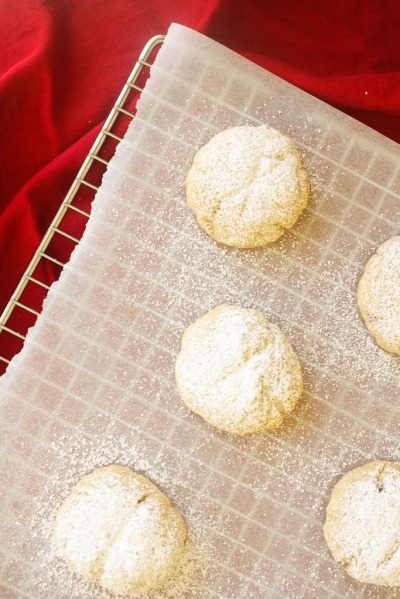
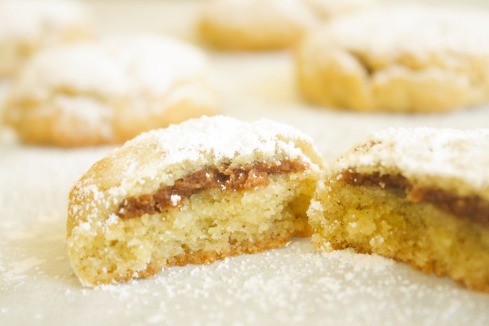
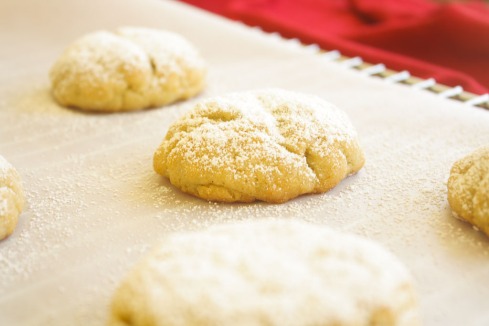
Though somewhat time-consuming to shape, these cookies’ handmade touch contributes to their charm. While nestling the sweet walnut filling inside a pocket of supple dough, I imagined my aunt learning this technique when she was a girl. Feeling a personal connection to a recipe makes eating it so much more fulfilling. Most importantly, however, the flavors here are wonderful. Semolina flour, traditionally used to make pasta, provides a toothsome texture and tender crumb, its robustness offset by a sliver of walnut-cinnamon paste. To finish, an elegant coating of powdered sugar makes these dainty treats ideal for serving alongside a cup of tea.

IMG_0715

Recipe adapted from Armenian Vegan 

These cookies can be adapted using various nuts and spices. Possible combinations include pistachio and rose water or date and orange blossom water. 

For the cookie dough:

  • 2 1/4 cups farina or semolina flour
  • 1 cup all-purpose flour
  • 1/2 cup granulated sugar
  • 1 teaspoon cardamon, preferably freshly ground
  • 1 teaspoon baking powder
  • 1/2 teaspoon baking soda
  • 1/4 teaspoon salt
  • 1 cup melted margarine or butter (for non-vegan option), melted and cooled
  • 1/2 cup soy milk or cow’s milk (for non-vegan)
  • 2-4 tablespoons orange blossom or rose water

For the walnut filling:

  • 1 cup chopped walnuts
  • 1/4 cup granulated sugar
  • 1 1/2 teaspoons cinnamon
  • Pinch of nutmeg
  • Pinch of allspice
  • Powdered sugar for dusting

Yields about two dozen cookies.

1. In a large bowl, sift the flour, baking powder, and baking soda. Add the farina or semolina flour, sugar, salt, and ground cardamom and mix thoroughly with a whisk or fork. Mix in melted margarine or butter with a spoon. Bring milk to a boil, add to the flour mixture, and mix well. Knead the dough with your hands until it reaches a smooth pasty consistency, about 1 minute. Add the orange blossom or rose water, knead a few more times to combine. Cover the bowl with plastic wrap and allow the dough to rest at room temperature for 2-3 hours.

2. Meanwhile, make walnut filling. Place walnuts, sugar, cinnamon, nutmeg, and allspice into a small food processor. Process on high speed until the mixture reaches a moist, pasty consistency, about 1 minute.

3. Preheat the oven to 350 degrees F. Place racks in the lower and upper thirds of the oven. When the dough is ready, measure out tablespoons of dough. Roll each piece into a ball and make an indent in the center, creating a little cup. Place 3/4 teaspoon of walnut paste into the cup, flatten it, then place another flattened ball of dough on top. Seal the seams tightly but carefully with you fingers. Repeat with remaining dough. If you own a Ma’amoul mold, you may use it instead.

4. Place stuffed cookies an inch apart on a baking sheet lined with parchment paper. Bake for 10 minutes on the lower level of the oven, then transfer them to the top shelf for an additional 3-5 minutes, until lightly golden brown. Transfer the parchment onto a cooling rack, and allow the cookies to cool completely. Once cool, dust cookies with powdered sugar.

Bill Granger’s Coconut Bread

17 May

IMG_0632

Certain meals occupy a special place in my heart, not simply because of delicious food, but the memories that accompany these experiences. When my family and I traveled to Australia last year, we visited a Sydney breakfast institution called Bills.

Bill Granger, the restaurant’s owner and a prominent Aussie chef and cookbook author, emphasizes a fresh and easy-going approach to cooking. For breakfast, Bills specialties include silky scrambled eggs, cloud-like ricotta pancakes topped with bananas and honeycomb butter, and organic sourdough toast smothered with fruit preserves. Other than being one of the tastiest breakfasts I’ve ever had, Bills’s bustling, light-filled atmosphere and welcoming service encapsulated my trip to Australia.

IMG_0668-2

While Bills offers a short and simple menu, every dish was masterfully executed using high-quality ingredients. My family and I each ordered the famous scrambled eggs (there’s a reason the New York Times crowned Granger the “Egg Master of Sydney”), and selected this coconut bread as a sweet complement.

Despite its humble description, this loaf boasts rich coconut flavor and a tender, sturdy crumb. While it is wonderful enjoyed plain, Bills serves it grilled, cut in thick slabs, with a dollop of butter and honey on the side. Best of all, every bite transports me to that sunny morning spent in a foreign country, enjoying vibrant, unfussy food with the people I love.

Recipe courtesy of the New York Times, via Smitten Kitchen

  • 2 large eggs, at room temperature
  • 1 1/4 cups milk
  • 1 tsp vanilla extract
  • 2 1/2 cups all-purpose flour
  • 1/4 teaspoon salt
  • 2 tsp baking powder
  • 1 to 2 tsp ground cinnamon
  • 1 cup granulated sugar
  • 5 ounces sweetened flaked coconut (about 1 1/2 cups)
  • 6 tblsp unsalted butter, melted or melted and browned, if desired
  • Vegetable oil or nonstick cooking spray for baking pan

1. Preheat oven to 350 degrees F. In a small bowl, whisk together eggs, milk and vanilla.

2. In a medium bowl, sift together flour, salt, baking powder and cinnamon. Add sugar and coconut, and stir to mix. Make a well in the center, and pour in egg mixture, then stir wet and dry ingredients together until just combined. Add butter, and stir until just smooth — be careful not to overmix.

3. Butter and flour a 9×5-inch loaf pan, or coat it with a nonstick spray. Spread batter in pan and bake until a toothpick inserted into the center comes out clean, anywhere from 1 to 1 1/4 hours. Cool in pan five minutes, before turning out onto a cooling rack.

Cardamom-Lemon Sticky Buns

6 May

IMG_0490-2

I have a love-hate relationship with social media. With Instagram, whenever I enjoy a delicious meal or notice something pretty on the street, I immediately reach for my iPhone camera. While I love capturing beautiful photos of special moments, I recognize the constant pressure to share that accompanies this platform. Through publishing photos, users validate the importance of their experiences, measuring positive reinforcement through ‘likes.’

IMG_0487-2

While making these buns, I stopped intermittently to snap photos. I climbed on top of chairs to achieve the perfect angle and even paraded around my house with a hot pan in order to find ideal light. Even though I am smitten with the final product, this hilariously arduous photo shoot hindered me from fully enjoying the baking process.

While I do not plan to delete my Instagram account, it is important for me to be aware of social media’s impacts. That being said, now we can talk about these sticky buns! The combination of fragrant cardamom, lemon, and warm yeast created an intoxicating smell while baking, and made for a more sophisticated flavor than the traditional cinnamon variety. While somewhat time-consuming, the techniques are relatively simple. Be patient with rising times and do not overwork the dough. You can even shape the buns then allow them to rise overnight, a standout dish for weekend breakfast or brunch.

Recipe slightly adapted from Food52.com

I found the lemon glaze from the original recipe to be quite sour. Instead, I’ve included a simple cream cheese glaze, which I think would offset the tanginess of the citrus. 

For the sticky bun dough:

  • 3/4 cups whole or 2% milk, just warm to the touch
  • 1/2 cup (1 stick) unsalted butter, melted and cooled 
  • 1/3 cup granulated sugar
  • 2 1/4 tsp active dry yeast
  • 1 tsp salt
  • 2 tsp ground cardamom (preferably freshly ground)
  • large egg, beaten
  • cups (approximately) all purpose flour (plus more as needed)

For the filling:

I only used about half of these ingredients. Two tablespoons of butter and 1/3 cup of lemon-sugar were enough to coat the dough. 

  • 2/3 cups granulated sugar
  • tblsp fresh lemon zest (from about 3 large lemons)
  • 4 tblsp very soft butter

For the cream cheese glaze:

  • 1/4 cup cream cheese, softened
  • 3 tblsp milk (if you prefer a hint of lemon flavor, replace one tablespoon of milk with lemon juice)
  • 1 1/2 cups powdered sugar (or enough to make a glaze consistency), sifted
  • Toasted pecan pieces, for topping (optional)

Yields about 14 buns.

1. Combine the warm milk, melted butter, and sugar in a large mixing bowl or in the bowl of a stand mixer. Stir in the yeast and let it sit until the yeast is foamy, about 7-10 minutes. Then, stir in the salt, cardamom, and beaten egg.

2. Stir in 2 cups of flour. Gradually add rest of flour little by little, until the dough feels sticky to the touch but doesn’t actually stick to your fingers. You want to avoid adding too much flour as this will keep the dough from rising as well as it could (I had about 1/4 cup left over). Knead the dough in a mixer on medium-low speed with a bread hook for about 6 minutes or by hand on a lightly floured surface for 10 minutes.

3. Transfer the dough to a lightly oiled bowl, cover it with plastic wrap or a damp kitchen towel, and set somewhere warm to rise until doubled in size, about 2 hours. Proceed with making the filling and assembling the buns.

4. While the bun dough is rising, mix together the granulated sugar and lemon zest and set aside. Grease two 8-inch round cake pans (or a 9X13 pan). After the dough has risen, take it out of the bowl and on a lightly floured surface roll it into a large rectangle about 1/4-inch thick. Spread the dough rectangle with the soft butter, then sprinkle it evenly with the sugar-zest mixture.

5. Roll the rectangle up lengthwise into a long jellyroll. Slice it with a sharp serrated knife into 1-inch thick pieces. Arrange the pieces in the prepared baking pans, leaving a little space around them for them to rise and grow. Cover and place in a warm place to rise until doubled in size, about another hour. Or, put the rolls in the refrigerator to slowly rise overnight. Take them out in the morning. If they haven’t risen much in the fridge, let them come to room temperature and give them a few hours to rise.

6. When the rolls are almost finished rising, heat your oven to 350 degrees F. Bake the rolls in the oven until golden brown, about 25 minutes. Take them out and allow them to cool to lukewarm before drizzling with the glaze. While the glaze is wet, top with pecan pieces for extra crunch and flavor contrast.

7. To make the glaze, whisk together the milk, lemon juice (if using) with powdered sugar until it reaches glaze consistency. Drizzle over the sticky buns. These buns are best eaten the day they’re made, though they rewarm relatively well. If you want to keep them longer, you can take them as soon as they’ve cooled to room temperature, wrap them well in tinfoil and stick them in the freezer. Let them defrost at room temperature and gently rewarm them in the oven before serving.

Chocolate Crème Fraîche Cookies

27 Mar

IMG_0198

While I do not condone extreme diets, eating food made with fresh, uncomplicated ingredients is important to me. But until last week, my admiration and passion for traditional French pastry had prevented me from experimenting with healthy, unconventional baked goods.

In my opinion, no gluten, dairy, and wheat-free pound cake can match one made with good ol’ butter, sugar, and all-purpose flour. That being said, after stumbling upon so many gorgeous photos of cookies and breads using wholesome ingredients, I decided to try a naturally gluten-free morning muffin recipe. The results were less than stellar.

IMG_0229

What started as a hopeful undertaking turned into an epic baking fail. Shredded carrots and apple, golden raisins, and coconut and almond flours morphed into a gritty-tasting stump that crumbled in my hands. For a second, I debated sending the muffins to school with my little sister, but feared that my reputation as bake sale queen would forever be tarnished. Both demoralized and slightly amused, I embarked upon another baking project the next day, deciding to stick to what I know.

It had been a while since I had made a pure chocolate cookie, and these could not have hit the spot more. The recipe comes from acclaimed chocolate makers Rick and Michael Mast, the geniuses behind Mast Brothers Chocolate Factory in Brooklyn. While some chocolate cookies can be overly-rich and dense, the addition of crème fraîche gives these an ethereally-light and soft texture.

So as much as I like the idea of incorporating healthier baked goods into my daily meal rotation, I’ve learned that some foods are best in their simple, indulgent forms.

Recipe courtesy of Bon Appétit, February 2014

These cookies spread quite a bit while baking, so make sure to leave ample space between each one. 

  • 20 oz bittersweet chocolate (at least 70% cacao), chopped, divided
  • 1/4 cup all-purpose flour
  • 1 1/2 tsp baking powder
  • 1 tsp kosher salt
  • 1 1/2 cups (packed) brown sugar
  • 1/2 cup (1 stick) unsalted butter, room temperature
  • 4 large eggs
  • 2 tablespoons crème fraîche or sour cream

Yields about 4 dozen.

1. Place racks in lower and upper thirds of oven. Heat 8 ounces chocolate in a heatproof bowl set over a saucepan of simmering water, stirring until chocolate is melted; let cool slightly. Reserve saucepan for melting more chocolate for glaze.

2. Sift flour, baking powder, and salt in a small bowl and whisk together; set aside. Using an electric mixer equipped with a paddle attachment, beat brown sugar and butter on medium-high speed until light and fluffy, about 4 minutes. Add eggs and crème fraîche and beat until just combined. Reduce speed to low and gradually mix in melted chocolate; reserve chocolate bowl. Mix in dry ingredients just to combine; fold in 8 ounces coarsely chopped chocolate. Do not overmix. Cover and chill dough until firm, at least 30 minutes.

3. Preheat oven to 350° F. Drop heaping tablespoonfuls of dough onto parchment-lined baking sheets, spacing 2″ apart. Bake cookies, rotating sheets halfway through, until edges are set but centers are still slightly soft, 15–18 minutes. Let cookies cool on baking sheets for 3 minutes. Transfer to wire racks and let cool.

4. Melt remaining 4 ounces chocolate in reserved bowl set over reserved saucepan of simmering water. Let chocolate cool slightly, then dip or drizzle cookies with chocolate as desired. Let sit until chocolate is set.