Recipe slightly adapted from Lauren’s Latest
Ingredients
1/4 cup granulated sugar
3 tablespoons cornstarch, sifted
1/4 cup good quality, unsweetened cocoa powder, sifted
1/8 teaspoon salt
1 cup fat free half & half
1 cup milk
2 oz. good quality, chopped semisweet dark chocolate, such as scharffen berger
1/2 teaspoon vanilla extract
Freshly whipped cream, for serving
Milk chocolate shavings, for serving
Makes 6, half-cup servings
1. In a small saucepan, whisk sugar, cornstarch, cocoa powder, and salt together until combined. Slowly stream in the half & half and milk, whisking to prevent lumps. Place the pan over medium high heat and whisk until the mixture starts to steam. Sprinkle in chopped dark chocolate and continue stirring until it has melted and the pudding has bubbled and thickened.
2. Remove the pudding from the heat and stir in the vanilla bean extract. Pour the pudding evenly into serving cups of your choice. Place plastic wrap directly onto the pudding and refrigerate it until completely chilled, approximately two hours. Remove the plastic wrap and top the pudding with whipped cream and milk chocolate shavings.
Light and airy, filled with tones of decadent dark chocolate, and topped with freshly whipped cream and milk chocolate shavings, this pudding is the chocolate lover’s dream. It is the ideal item to satisfy your sweet craving and can be thrown together in less than 15 minutes. Unlike the store-bought puddings that are packed with sugar and artificial flavorings, every bite of this homemade snack tastes like pure, unmasked chocolate. This would be a wonderful dessert to prepare for a summer barbecue, placed in vodka glasses and served with colorful, mini plastic spoons. For a bit of added crunch, sprinkle cocoa nibs or mini semisweet chocolate chips into the warm pudding while pouring the pudding in the cups.
Double Chocolate Pudding
18 JunCloud-like Lemon Cupcakes
3 MayRecipe courtesy of Sifting Focus
For the cake:
- 4 tablespoons unsalted butter, cut into 1 tablespoon pieces
- 1 1/2 cups granulated sugar
- 1 tablespoon freshly squeezed lemon juice
- Zest of 2 lemons
- 1/3 cup canola oil
- 3 large egg yolks
- 2 large eggs
- 1 3/4 cups cake flour
- 1 3/4 teaspoons baking powder
- 1/2 teaspoon salt
- 1/3 cup buttermilk
- 1/2 cup heavy cream
For the frosting:
- 4 tablespoons unsalted butter, softened
- 4 oz. cream cheese, softened
- Juice and zest from 2 lemons
- Generous pinch of salt
- 4 cups sifted confectioner’s sugar
Yields 24 cupcakes.
1. Line muffin tins with cupcake liners. Preheat oven to 350 degrees F. In the bowl of a stand mixer fitted with a paddle attachment, beat the butter to soften. Beat on medium speed, until it is light in color, about 3 minutes. Add the sugar and continue to beat until very light, scraping down the sides and across the bottom of the bowl at least once. Beat in the lemon juice and zest. On medium speed, blend in the oil.
2. On the lowest speed, blend in the yolks, one at a time, mixing just to blend. Blend in the whole eggs, one at a time, mixing just to blend.
In a separate medium bowl, thoroughly whisk together the flour, baking powder, and salt. On the lowest speed, blend over half of the flour mixture into the batter. Continue on the lowest speed and blend in half of the buttermilk. Continue adding the remainder of the flour until all is incorporated. Blend in the remaining buttermilk.
3. In a separate mixing bowl, whip the heavy cream until soft peaks form. Beat just a little beyond this soft-peak stage. Stir about one-quarter of the whipped cream into the batter to lighten. Then fold the rest of the whipped cream into the batter.
4. Spoon the batter into the cupcake liners using a small scoop or tablespoon. Fill slightly more than one half full. Gently tap the tins on the counter to release any air bubbles. Bake for 12 to 14 minutes or until a cake tester inserted into the middle of one of the center cupcakes comes out clean. Switch the tins half way through to insure even baking.
5. Remove the cupcakes from the oven to a rack and cool in the tin for 10 minutes. Remove from the tin and cool completely before frosting.
6. To make the frosting: In the bowl of an electric mixer fitted with a paddle attachment, thoroughly mix together the butter and cream cheese. Add the lemon juice, zest, and salt and mix to combine. On low speed, add the confectioner’s sugar, one cup at a time until you reach the desired spreading consistency. To finish, frost the cooled cupcakes and serve.
This lovely spring cupcake recipe comes from the newly-launched blog, Sifting Focus. I have had the pleasure of getting to know the creative force behind Sifting Focus, Mary. A talented baker, Mary has thoughtfully advised me on numerous questions and concerns I have had. I have confided in her in everything from demoralizing kitchen failures to challenges with photography. We have exchanged notes on our favorite cookbooks and bakeries from around the country. I vividly remember sending Mary an email after I successfully baked dessert for a Christmas party of more than 30 people. Jubilant language and exclamation points filled the message. I was thrilled to be communicating with someone who could resonate with my excitement at accomplishing such a task. It is incredible how blogging has connected us, two people from completely different backgrounds, bonding over a mutual love of food and baking.
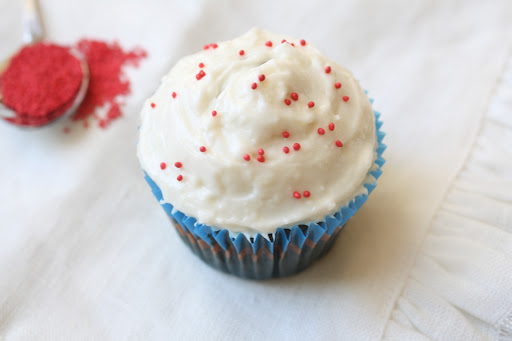
For six months after we first met, I eagerly awaited the debut of her blog. When it finally launched in February, I was blown away. Mary’s writing was eloquent and personable, her photographs were beautiful, and her recipes looked delectable. Every item appeared so delicious that I was left with the difficult choice of which to try first. After much deliberation, I decided upon these light lemon cupcakes. What makes these treats so airy is the freshly whipped cream that is folded into the batter before baking. The cake’s texture resembles that of a cloud, irresistibly soft and puffy. The dough contains a subtle tanginess from the lemon juice and zest, complemented perfectly by the decadent cream cheese frosting. After this experience, I cannot wait to try more recipes from Mary’s fabulous site.
Best Gelato in LA: Bulgarini
28 Mar Bulgarini Gelato, a modest shop tucked inside the alley way of a strip mall in Altadena, CA, may be the reason I never eat store-bought ice cream again. The gelato from this hole-in-the-wall store blew me away. Husband-and-wife team Leo Bulgarini and Eliabeth Foldi select the finest ingredients from around the world for their products, starting with milk from Broguiere’s Dairy in Montebello, CA. Unlike traditional ice cream, which contains 18-22% milk fat, Bulgarini’s gelato hosts only 2-4% milk fat. The low fat concentration allows the high-quality nuts, fruits, and chocolates to take center stage. The acclaimed pistachio gelato tastes like an handful of aromatic pistachios, hand-picked and imported from Sicily, have been freshly ground into each bite. The rich dark chocolate gelato is sophisticated and sinful all at once. The goat’s milk with cocoa nib gelato is earthy but not overbearing.
A small serving at Bulgarini starts at three golf-ball-sized scoops, forcing you to choose from a plethora of possible flavor groupings. If you become as overwhelmed as I was during my decision process, the patient and friendly staff will surely answer any questions you have. They are generous with samples and describe each flavor in detail to ensure that you enjoy your experience to the fullest. With its amiable employees and incredible gelato, Bulgarini is simply without parallel in L.A.
Bulgarini Gelato
749 E. Altadena Dr.
Altadena, CA 91001
(626) 791-6174
– – – – – – – – – – – –
Monday-Thursday, 12 p.m. – 9:30 p.m.
Friday-Saturday, 10 a.m. – 11:30 p.m.
Sundays, 10 a.m. – 9:30 p.m.
Homemade Éclairs
26 MarRecipe courtesy of Tartine
Ingredients
For the choux paste:
1/2 cup milk
1/2 cup water
1/4 teaspoon salt
1 teaspoon sugar
1/2 cup unsalted butter
1 cup all-purpose flour
5 large eggs
For the pastry cream:
1 cup milk
1/4 vanilla bean, seeds scraped
1/8 teaspoon salt
2-3 tablespoons corn starch
1/4 cup plus 1 tablespoon granulated sugar
1 large egg
2 tablespoons unsalted butter
For the chocolate glaze:
4 oz. bittersweet chocolate, coarsely chopped
1 tablespoon light corn syrup
1/2 cup heavy whipping cream
Makes 12-16 éclairs
1. Preheat the oven to 425 degrees. Butter a baking sheet or line with parchment paper.
2. In a heavy saucepan over medium heat, combine the sugar, milk, water, salt and butter until the butter melts and the mixture comes to a full boil. Add the flour all at once, stirring vigorously with a wooden spoon. Keep stirring until the mixture has formed a smooth mass and pulls away from the sides of the pan and some of the moisture has evaporated, about 3 minutes. Transfer to the bowl of a standard mixer fitted with a paddle attachment. Add the eggs one at a time and mix at medium-high speed, incorporating each egg before adding the next. Once all the eggs have been added, transfer the dough to a pastry bag fitted with a half-inch tip. Pipe out fingers about 5 inches long and 1 inch wide, spacing them about 2 inches apart. If you end up with a bulge or tail at the end of the piping, smooth it over with a damp fingertip.
3. Bake the fingers until puffed and starting to show some color, about 10 minutes. Reduce the oven temperature to 375 degrees and continue to bake until the shells feel light for their size and are hollow inside, an additional 12 minutes. They should be nicely browned all over. Remove from the oven and, using a metal skewer, poke a small hole in the end of each shell to allow steam to escape. Let the shells cool on wire racks.
4. To make the pastry cream, pour the milk into a heavy saucepan. Split the vanilla bean lengthwise and use the tip of a sharp knife to scrape the seeds from the pod halves into the milk. Add the salt to the mixture, place the pan over medium-high heat, and bring just to a boil, stirring occasionally and making sure that the milk solids are not sticking to the bottom of the pan.
5. In a mixing bowl, whisk together the cornstarch and sugar. Add the eggs and whisk until smooth. When the milk is ready, slowly ladle about one-third of the hot milk into the egg mixture, whisking constantly. Pour the egg-milk mixture back into the hot milk and continue whisking over medium heat until the custard is as thick as lightly whipped cream. Remove the cream from the heat and immediately pour it through a sieve into the bowl. Let cool for 10 minutes, sitting occasionally to release the heat and prevent a skim from forming on top.
6. Cut the butter into 1-tablespoon pieces. When the pastry cream is ready, whisk the butter into the cream 1 tablespoon at a time, always whisking until smooth before adding the next tablespoon. To cool the cream, cover the bowl with plastic wrap, pressing the wrap directly onto the top of the cream, and place in the refrigerator. It can be stored in the fridge for up to 5 days.
7. To make the chocolate glaze, combine the chocolate and corn syrup in a heatproof bowl. Bring the cream to just under a boil in a small saucepan. Pour the cream over the chocolate. Let the mixture sit for about 2 minutes without stirring until the chocolate melts, and then stir gently with a rubber spatula until smooth and shiny.
8. To complete the eclairs, stir the cooled pastry cream until smooth and then spoon it into a pastry bag fitted with a 1/4-inch opening. Fill the shells by splitting them in half lengthwise with a serrated knife. Dip the top half of the shell in the glaze and then place upright on a wire rack and allow the glaze to set. Pipe the cream into the bottoms of shells and replace the glazed tops. Serve the pastries at once, or refrigerate for up to 6 hours before serving. Ideally, they should be eaten the same day they are filled.
With so many wonderful recipes available online, old-fashioned cookbooks can often be neglected. The beautiful photos, relatable descriptions, and daily updates of food blogs make it easy to forget about the dusty stack of books scrunched in a corner of the kitchen. So how was it that I woke up yesterday morning, picked Tartine off the shelf, and decided to make a pastry tucked away in the back of the book without a single accompanying photo? Well, I had the feeling, the emotion that only a baker can describe when a recipe just feels right. When an item speaks to you immediately: no second-guessing or unsureness, no mental processing if you have all the ingredients on-hand, just eagerness to get to work and eventually enjoy the fruits of your labor.
With that mindset, I embarked upon making this quintessential Parisian dessert. I performed each step slowly and carefully to ensure that I created the perfect éclair. My diligence paid off in the end; these delicate puff pastries were fabulous. The dough is barely crisp on the outside and turns soft as you sink your teeth into the decadent vanilla bean pastry cream on the inside. And of course, everything is better when dipped in chocolate. As a result of this experience, my cookbook collection has earned a more prominent spot in my kitchen.
Red Velvet Cupcakes
4 Mar
Cake recipe courtesy of Cocina Marie via Foodiecrush, frosting adapted from Annie’s Eats
Ingredients
For the cake:
2 sticks unsalted butter, softened
2 cups light brown sugar, packed
1 tablespoon vanilla extract
2 drops red food coloring
1 teaspoon distilled white vinegar (or other mild vinegar)
2 cups all-purpose flour
1/4 cup unsweetened cocoa powder, sifted
1 teaspoon baking soda
1/2 teaspoon salt
1 cup low-fat buttermilk
6 large eggs
For the frosting:
10 oz. cream cheese, chilled
6 1/2 tablespoons unsalted butter, at room temperature
1 3/4 cups powdered sugar, sifted
4 teaspoons vanilla extract
Makes two dozen cupcakes.
1. Preheat the oven to 350 degrees. Line two 12-cup muffin tins with paper or foil liners. In the bowl of an electric mixer equipped with a paddle attachment, beat the butter and sugar until fluffy. Mix in the vanilla extract, food coloring, and vinegar.
2. In a large bowl, combine the flour, baking soda, and salt. Sift the cocoa powder into the bowl (this step is very important because you do not want to end up with a clumpy batter). Mix these dry ingredients together and gradually add them to the butter mixture, alternating with the buttermilk. Once combined, beat in the eggs.
3. Fill lined muffin tins 3/4 full with the batter. Bake for 15-18 minutes, or until a toothpick inserted into the center of a cupcake comes out clean. Once finished baking, remove the cupcakes from the tins and place on wire racks to cool completely.
4. For the frosting: In the bowl of an electric mixer equipped with a paddle attachment, beat the butter, cream cheese, and vanilla extract until fluffy. On low speed, gradually add the sifted sugar to the mixture and beat until fully combined. Frost the cupcakes and top with sprinkles, if desired.
You know what I love more than baking? Sharing my baked goods with others. I relish the moment I arrive at school or at a party with a fresh batch of homemade treats. I love seeing the smiles on peoples’ faces as I unveil my creation and watching as they enjoy the special goodie. Some ravenously gobble sweets down and some carefully savor each bite. Either way, I feel satisfied having brightened someone’s day with a delicious item that came from my kitchen.
So you can imagine my excitement when I walked into school on Friday holding a tray lined with these dainty red velvet cupcakes. Super airy, cloud-like, and topped with a rich vanilla cream cheese frosting, these cupcakes are superb. The six eggs beaten into the batter create the ever-so-light texture and perfect moistness that distinguishes them from several others red velvet cupcakes I have tried. To finish, a spoonful of vanilla cream cheese icing smeared on top complements the fluffiness of the cake perfectly. In short, get to the kitchen, make these cupcakes, love them, and sit back and relax when others love them just as much as you do.


